0 Comments
Last October marked the start of my four-year apprenticeship in Diamond Mounting with the Worshipful Company of Goldsmiths, with my lovely dad as my Master.
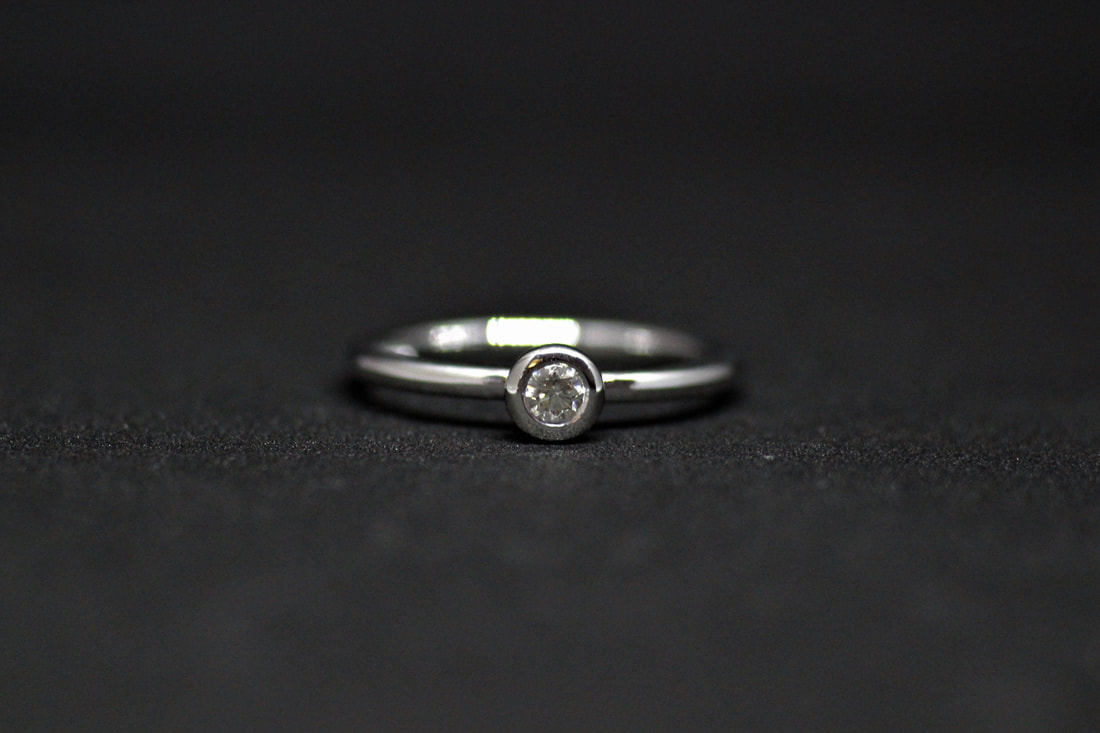
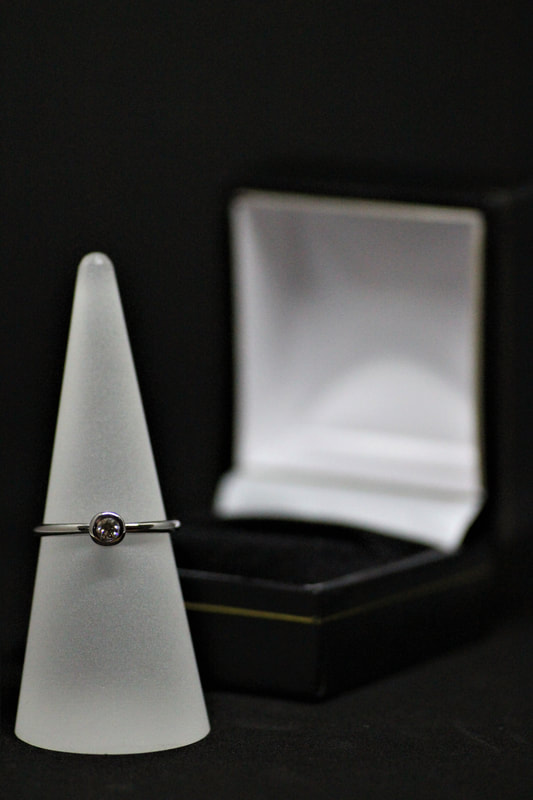
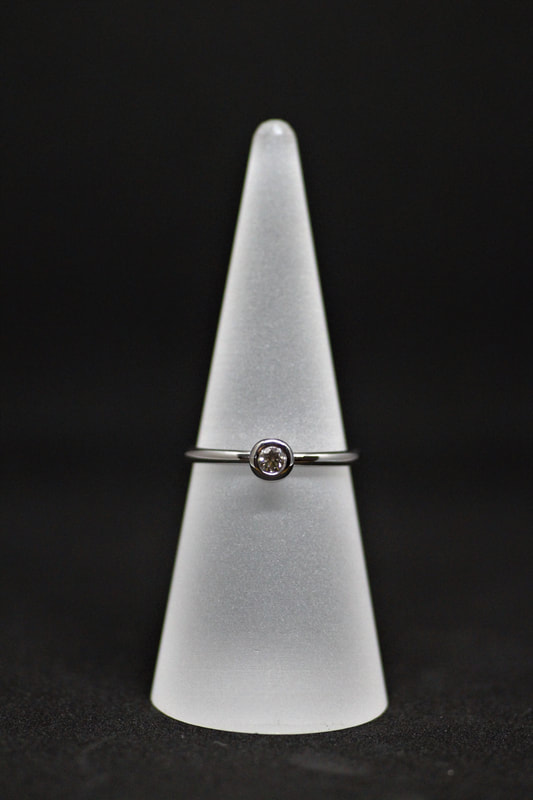
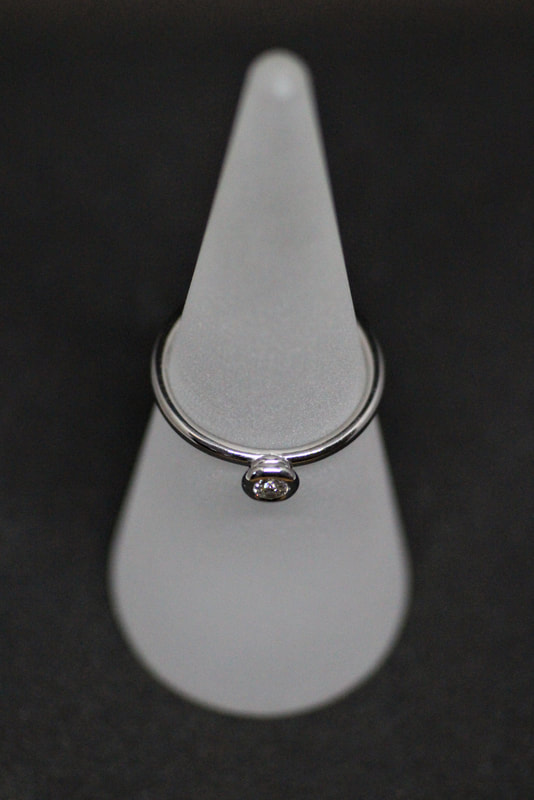
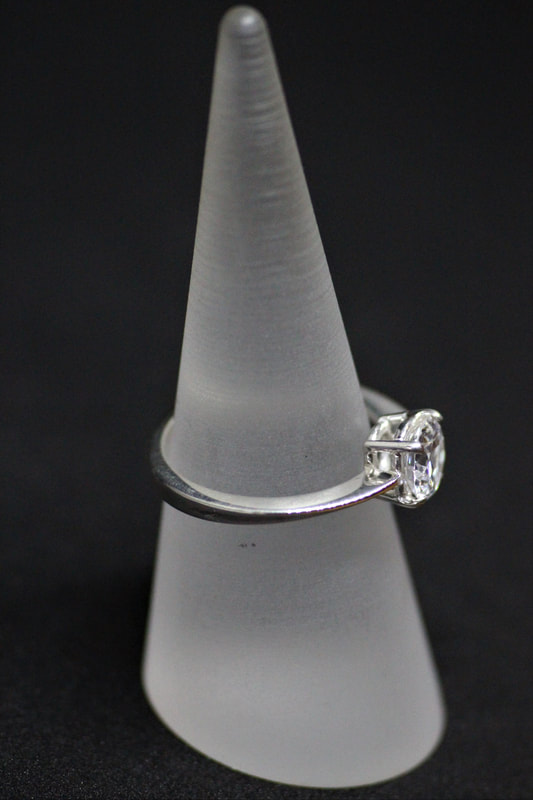
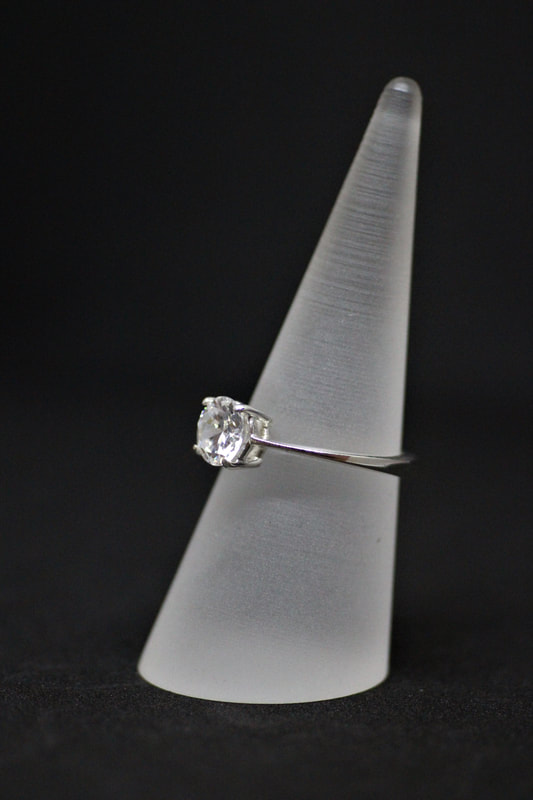
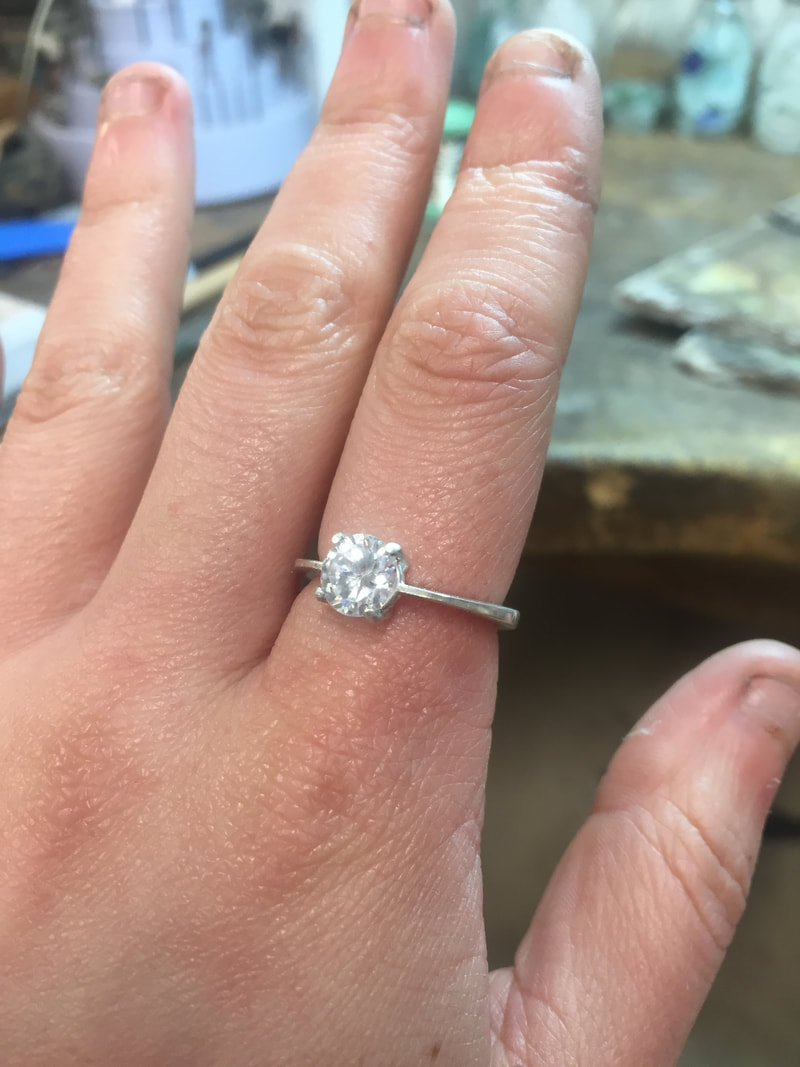
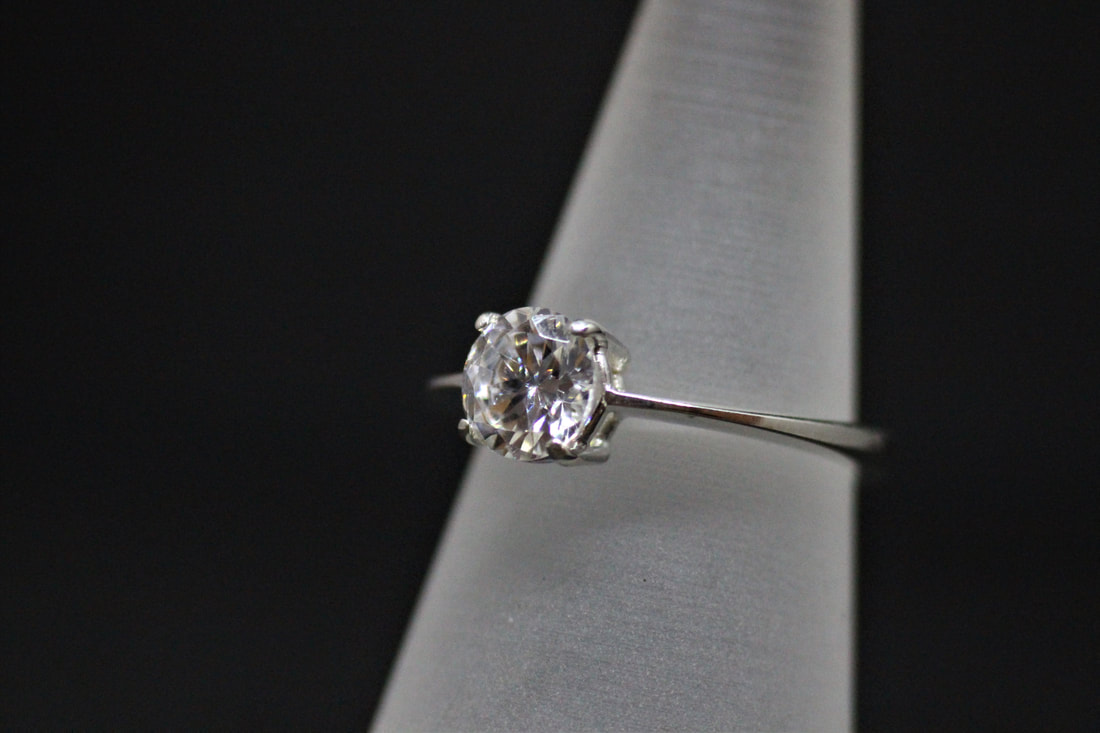
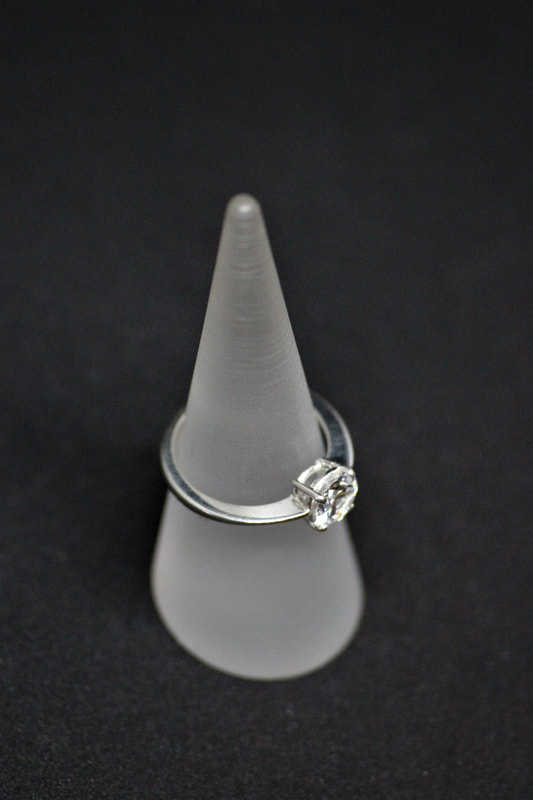
Since formally beginning my apprenticeship, I have begun to build and develop my hand skills in mounting. With the guidance and advice of my master and other talented trades people who surround us, I have already noticed a difference in my confidence to try making new things. Below is a small selection of items I have made over the year, all of which utilised a new skill or approach to manufacturing that I hadn't explored. Single Stone Court Ring and with Flush Set Diamonds
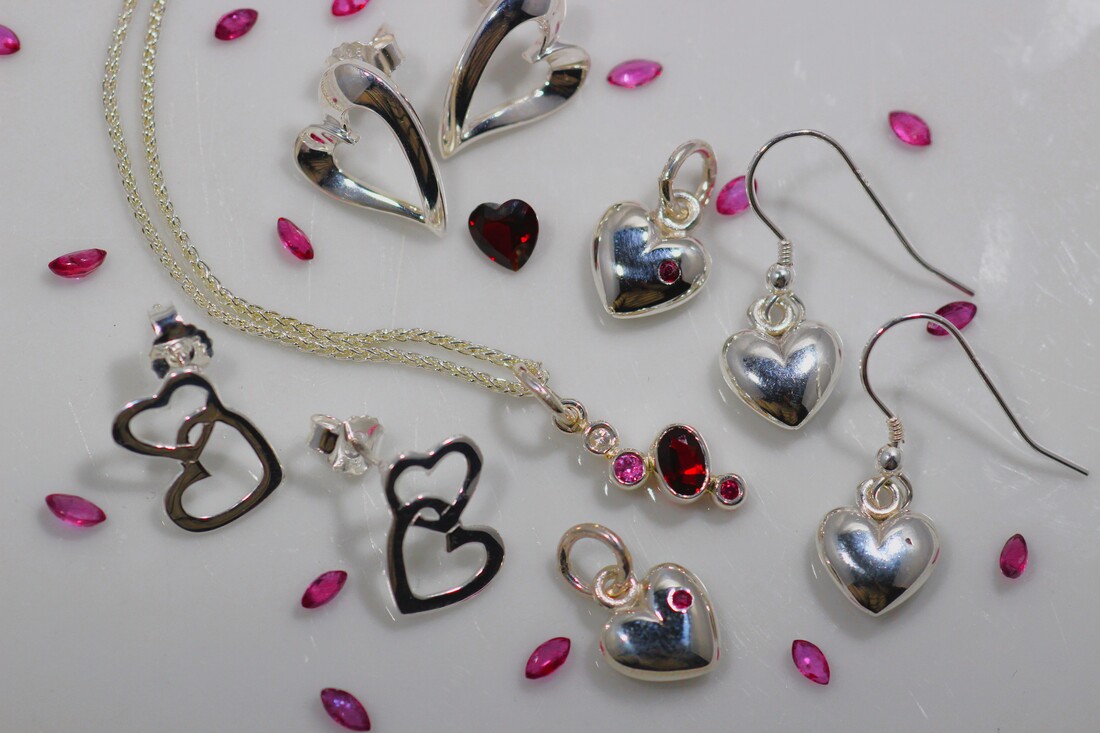
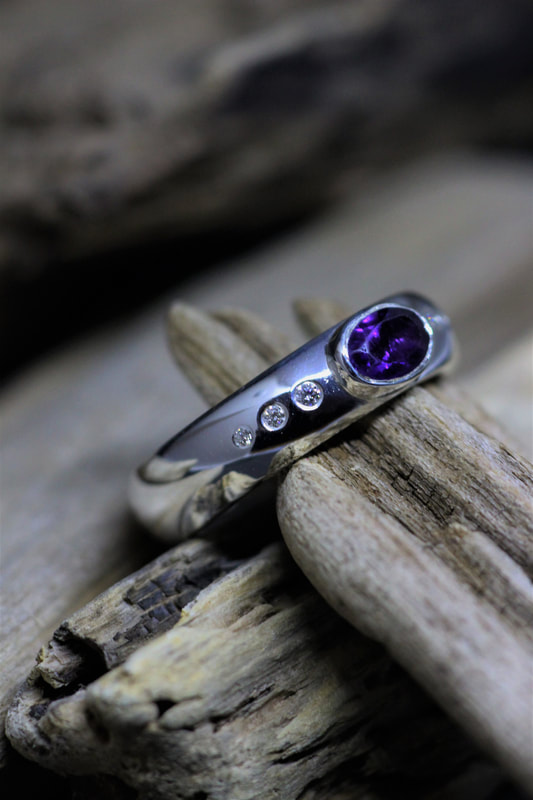
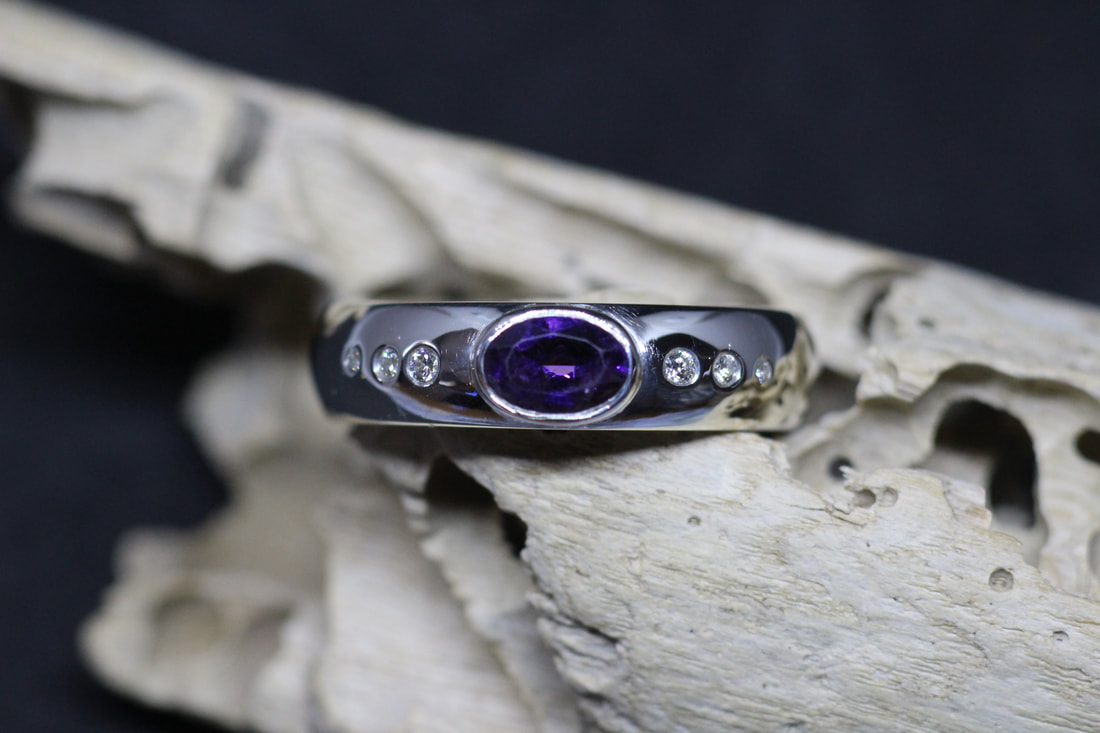
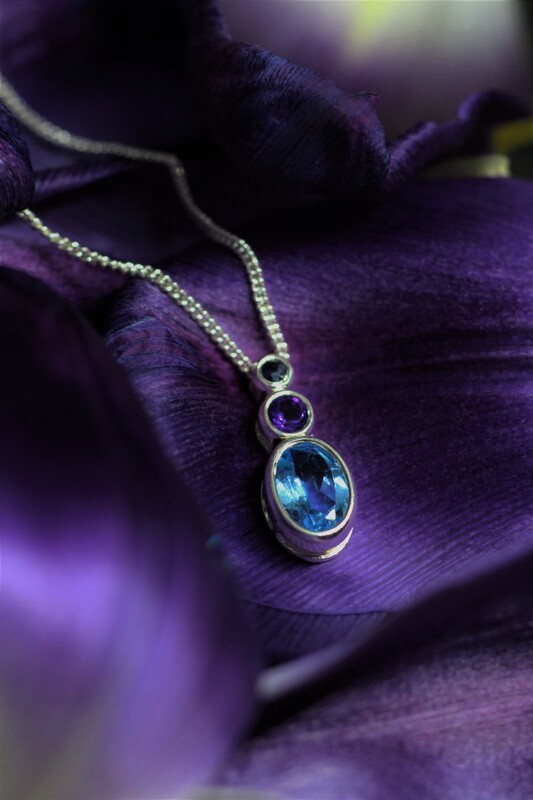
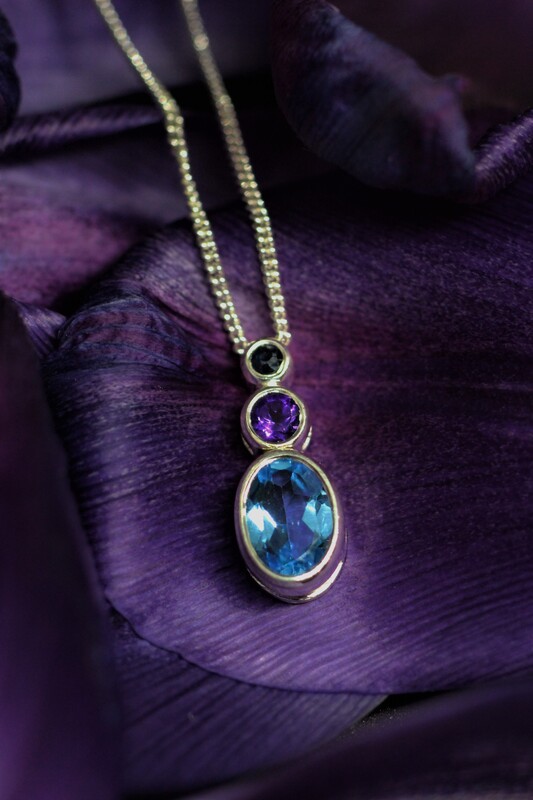
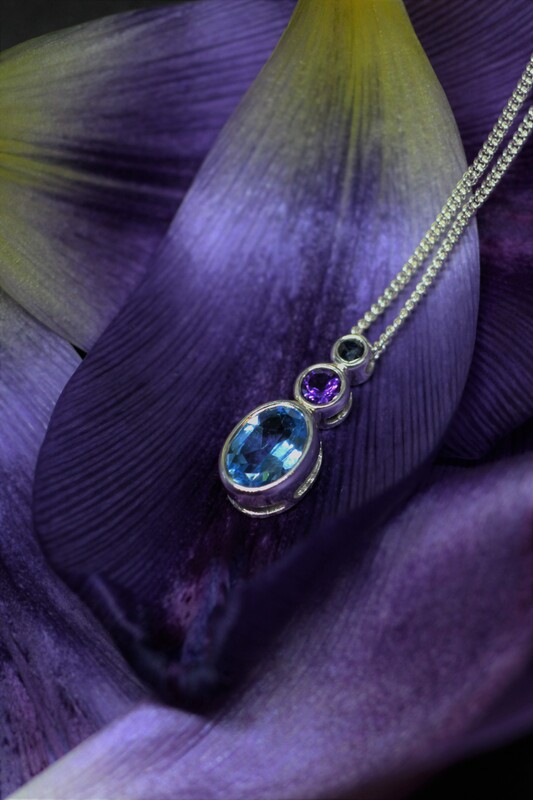
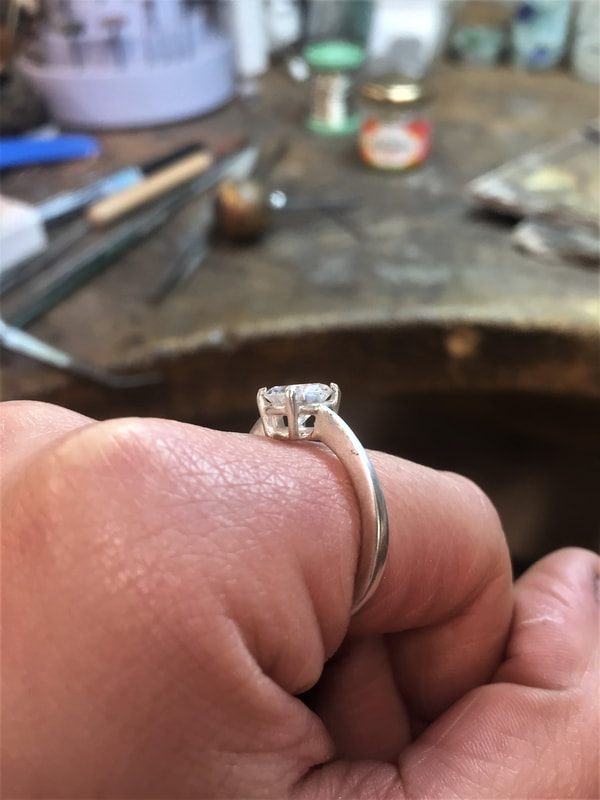
Sapphire, Amethyst and Topaz Drop Pendant It wasn't just me who loved the look of this pendant in our hut, as it walked out after being on display for a week. Since their purchase, this wonderful pair have been back and asked me to make a18ct White Gold Single Stone Ring for them, which was another first for me! See this on a blog post in the next few weeks. My next mission it to make another but with a different colour combination – I’m thinking Diamond, Citrine and Peridot. When making this I mostly struggled with piercing out the light window in the side of the bezels, this was the first light window I had ever pierced out and I was unsure on how to tackle it. Hopefully after making a few more of these I'll be able to do this with ease. Other items on my bench over the past few months...Each piece enabled me to experience something different; wax carving, chasing basic shapes to create the depth of form, different types of stone setting and be able to experiment with different mounts.
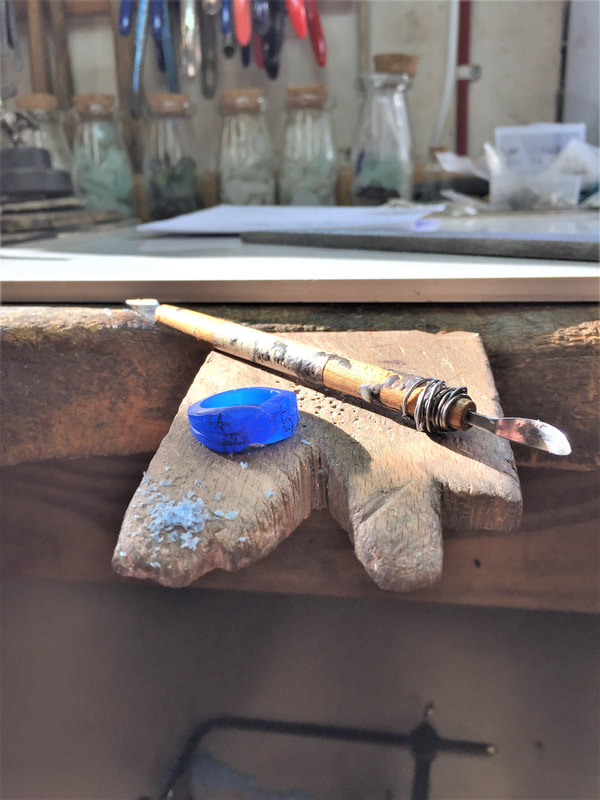
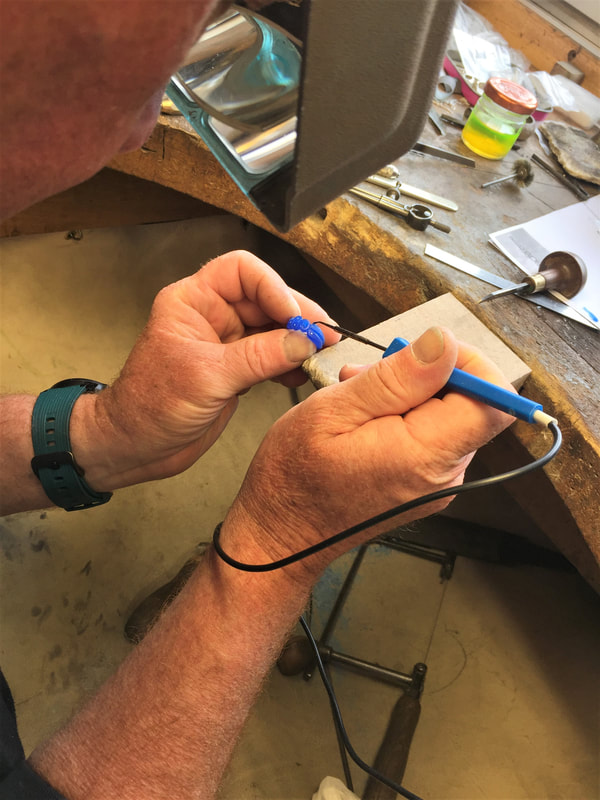
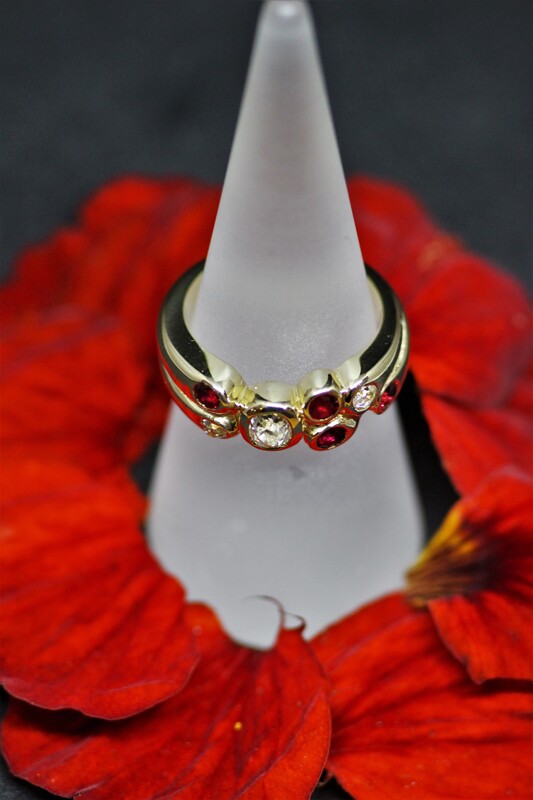
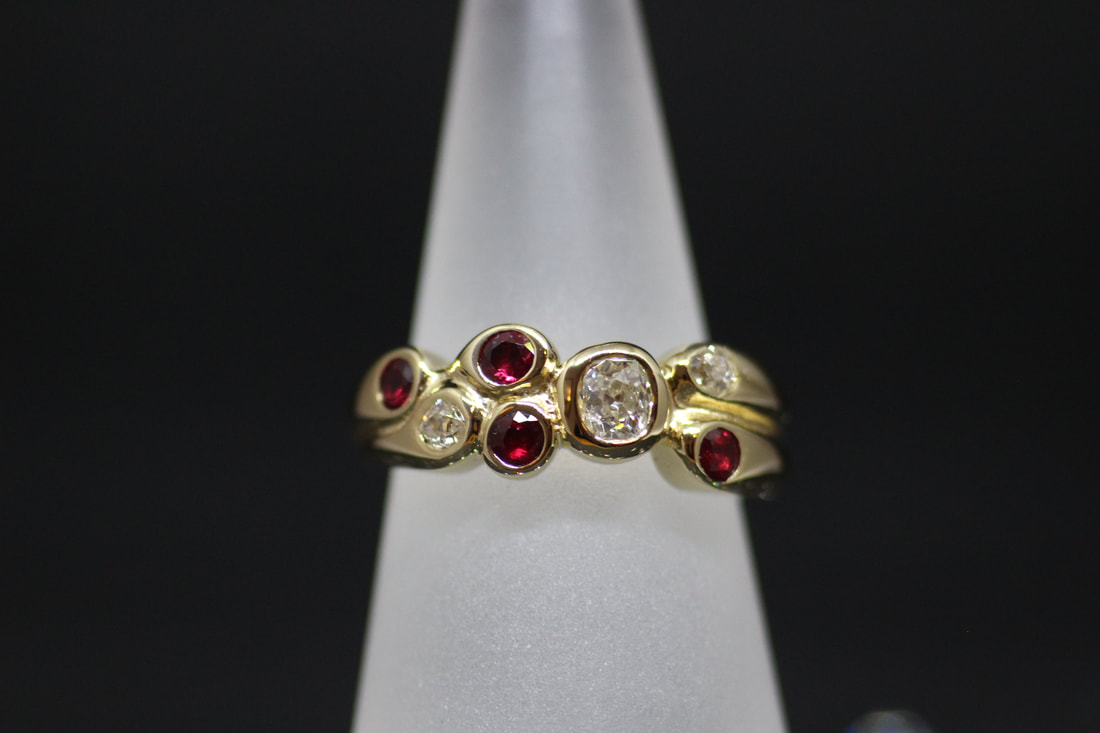
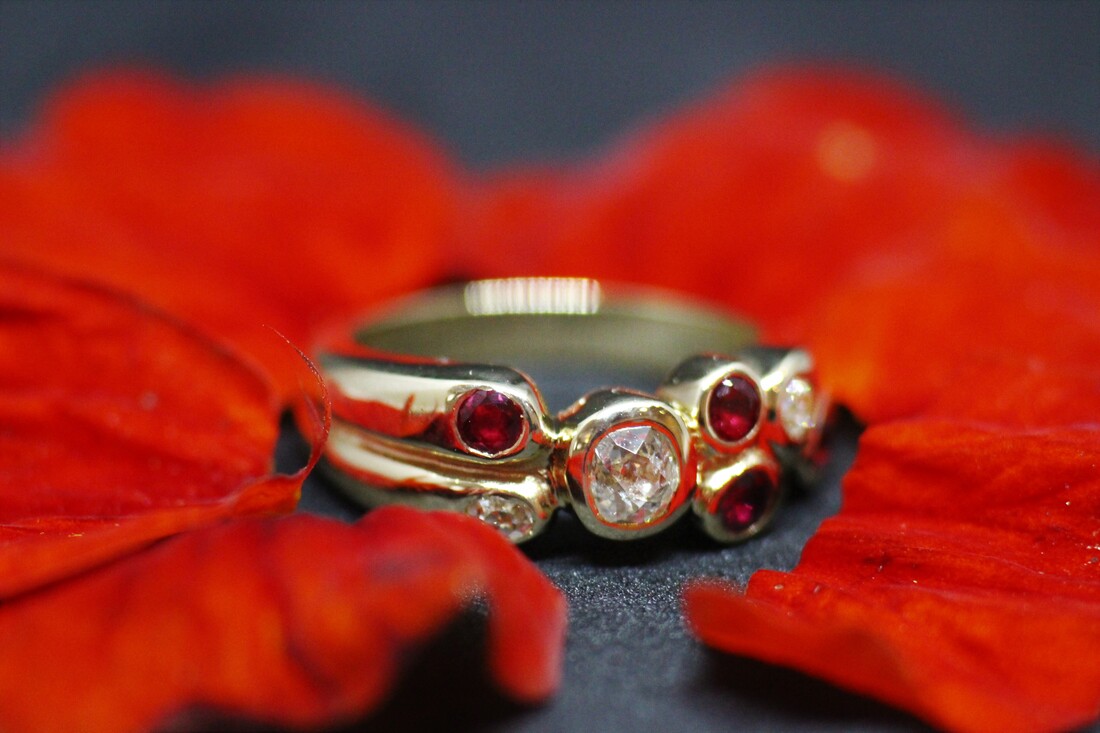
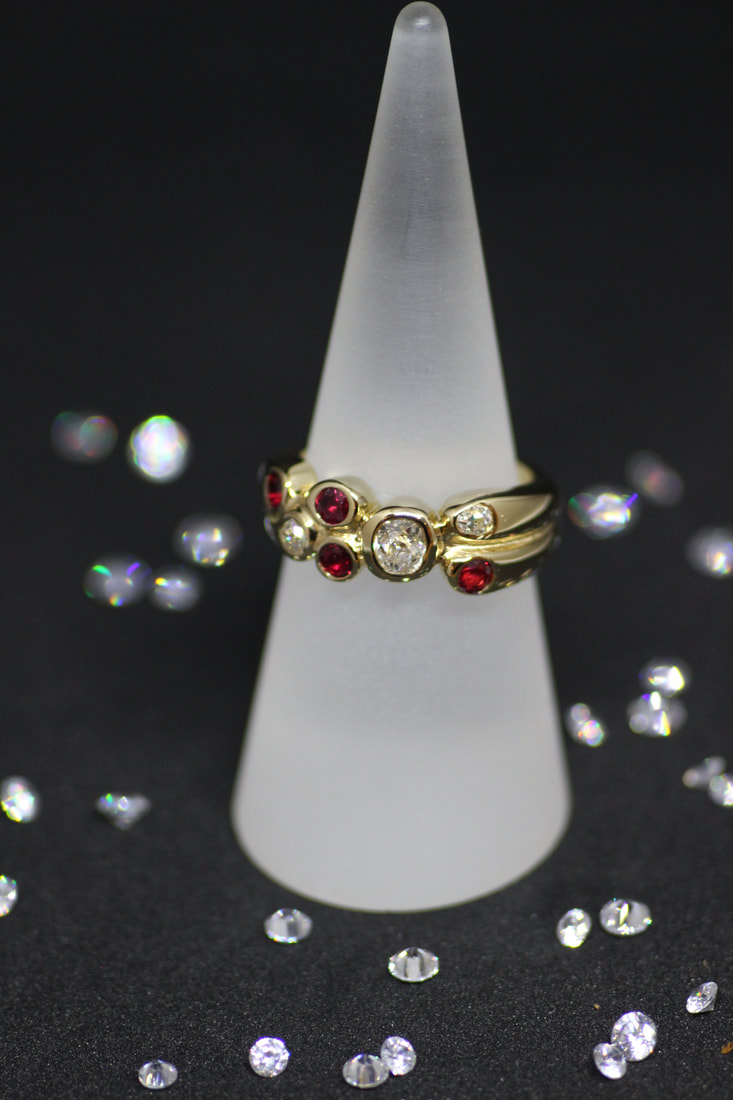
Today, and all days, we remember them. 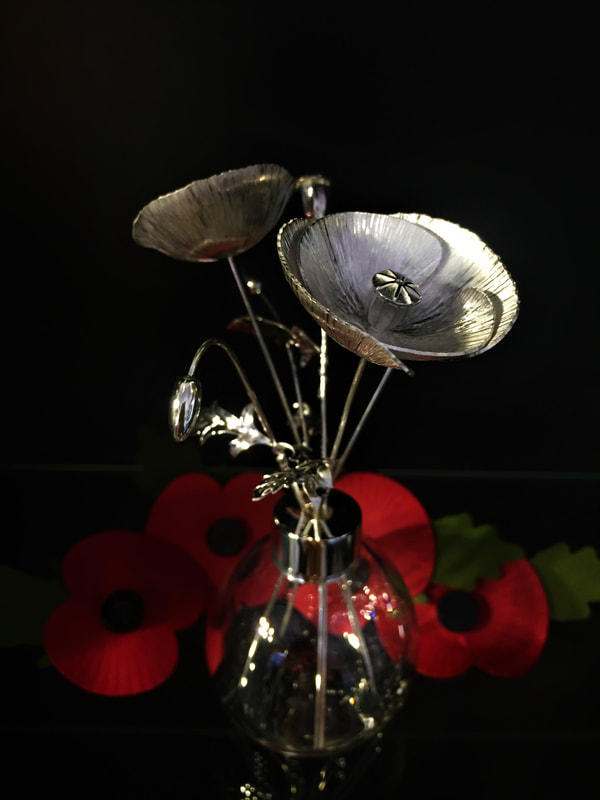 Ruby & Diamond Ring RemodelWe finally finished our first ever father-daughter carve off at just after 11pm one Monday night, despite the sore eyes, mushed brain and the late night it was undoubtedly a lovely new experience to sculpt, cut back and file wax to form a custom-made ring. Between our benches lay dads initial ring remodel design and side by side we challenged ourselves to carve the same ring but how we each thought it should look.
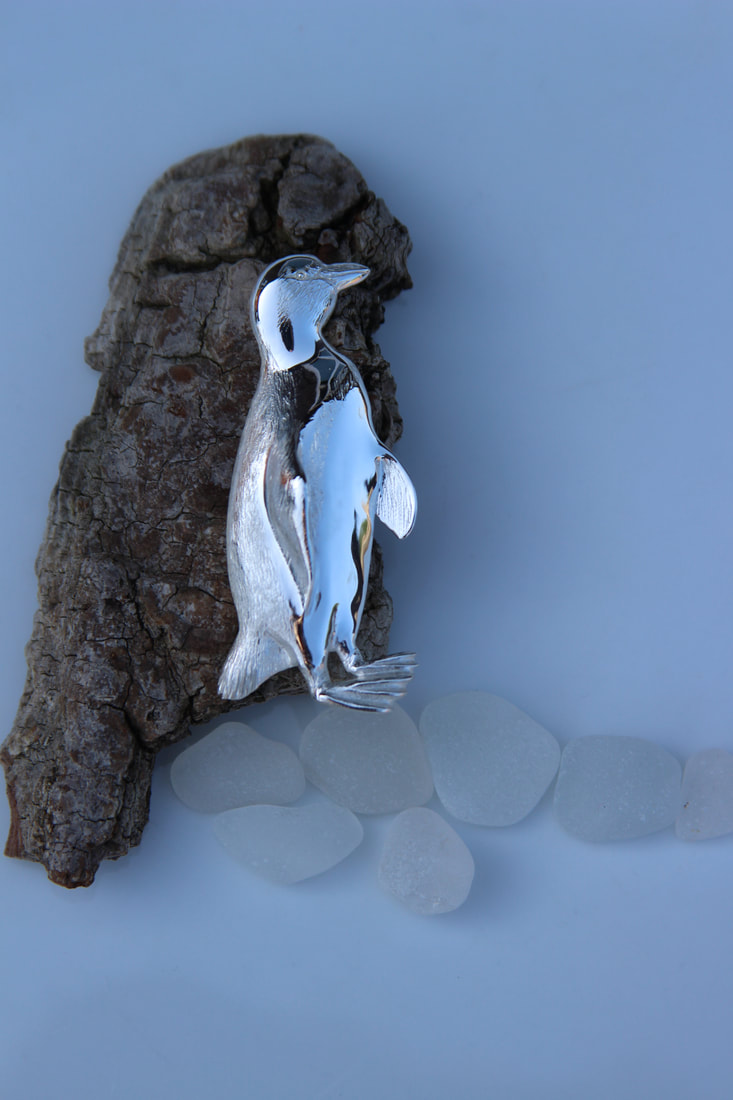
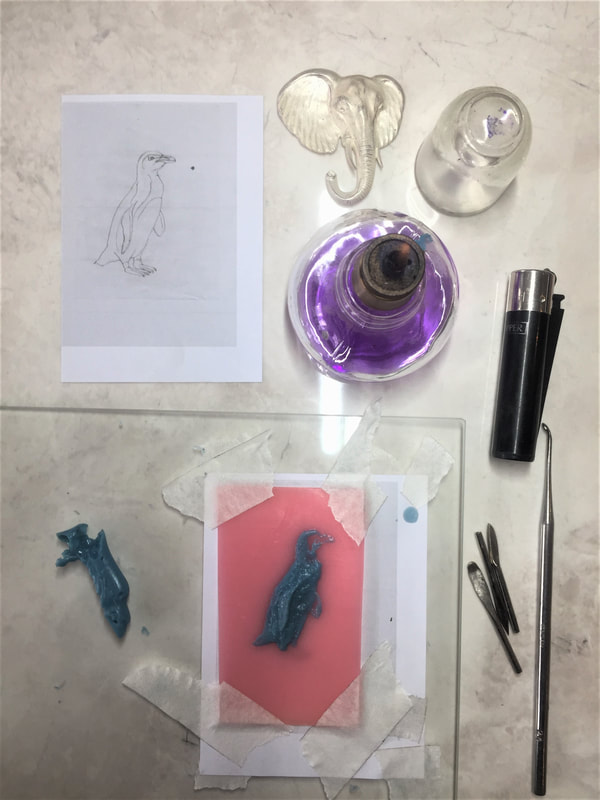
Fortunately, dad overcame this hurdle quicker than I and within the time frame he definitely won the contest, and rightly so as I thought his version of the ring was cleaner and looked more fluid and feminine in comparison. Penguin BroochThe ring wax carving experience came just at the right time, because soon after I was asked to create a brooch resembling a South African Cape Penguin for our Whitstable Harbour Masters Silver Wedding Anniversary gift.
It was at this point we decided to mark his dark areas with small strokes of my trusty seating burr to give the illusion of feathers, in turn also giving him texture. However I was given strict instruction to start from the bottom, in order to allow the feathers to lay the way they should.
Within the same few weeks we were visited by some wonderful customers who we absolutely clicked with and soon felt incredibly privileged when they asked us to make them one-of-a-kind engagement rings and a wedding band to mark their most memorable days. Just Married!
Using a bit of mathematical logic (that I didn't realise I had) I fabricated a flat band, pierced out a section just over the width of the sea glass setting and under tension, I soldered in the silver piece that mimicked the shape of the setting. Low and behold, a wedding band that tucked tightly against their new engagement ring was ready for polishing. After their big day we received the most beautiful message from them both. “Megan made our tying the knot extra special with an amazing set of rings. After getting the new engagement ring Chris proposed a second time down on the beach at whitstable. Absolutely beautiful having our memories built in our favourite place and having that extra special ring that seals the deal made by such a lovely father and daughter. Thank you both so much.” Newly Engaged! We are also so thrilled for the newly engaged Jake and Grace! Jake approached us wishing to propose to his now-fiancé with a ring that truly symbolised them both. Their fond memories of the southwest coast entwined with the traditional use of diamonds was channelled into making a perfect ring for his proposal in their favourite place.
A massive congratulations to you all and thank you so much for choosing us to create these bespoke pieces. It was an honour to make rings for your special days. We are sending you all the happiest of wishes for your future endeavours.
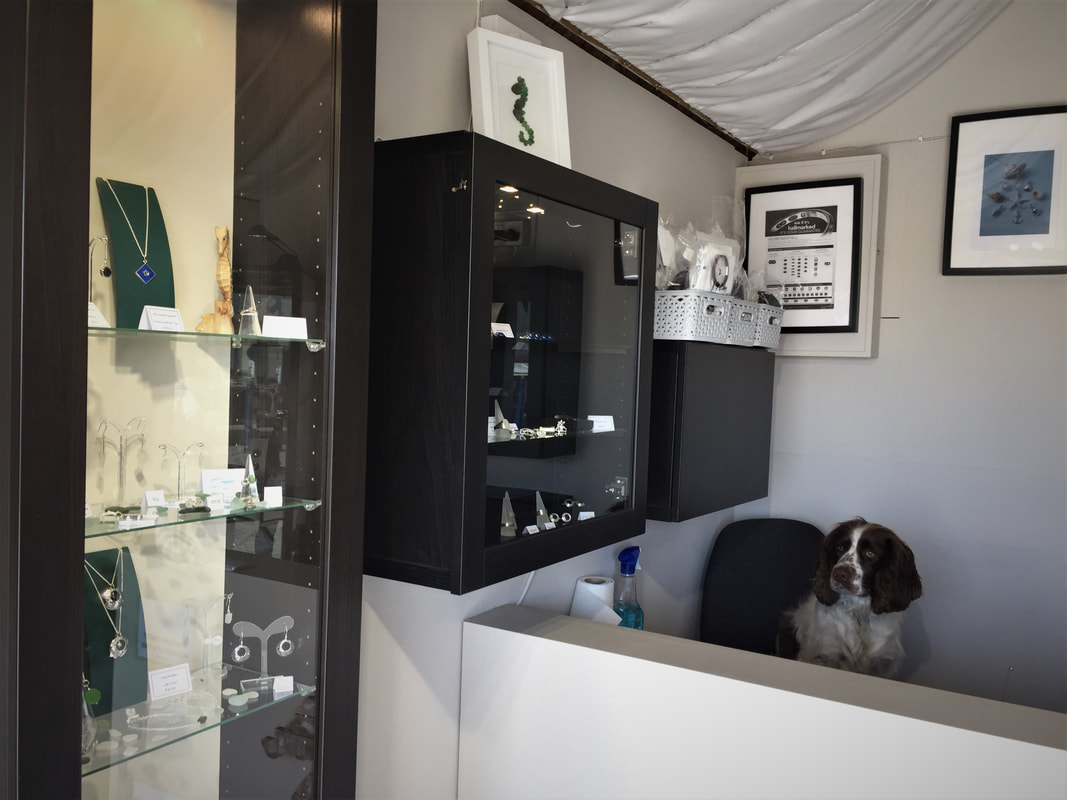
A few positive alterations in our hut have seen us be much happier with the presentation of our handmade work in the shop. We welcome Whitstable Sea Treasures to our doors, a talented local artist whose beautiful sea glass pictures perfectly complement our range of handmade silver sea glass jewellery. The Whitstable Lifeboats are supported with every picture purchase, as we believe it is greatly important to try to support local organisations that operate using voluntary funds to carry out their life saving work.
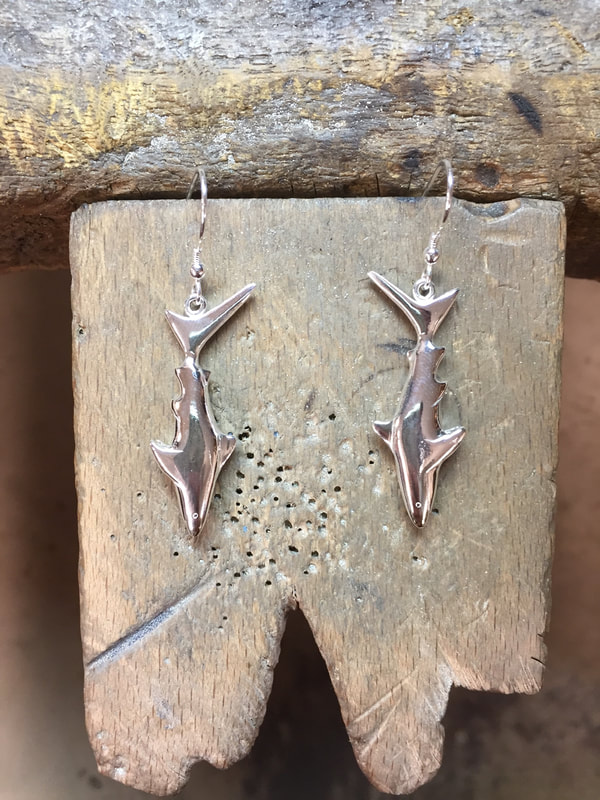
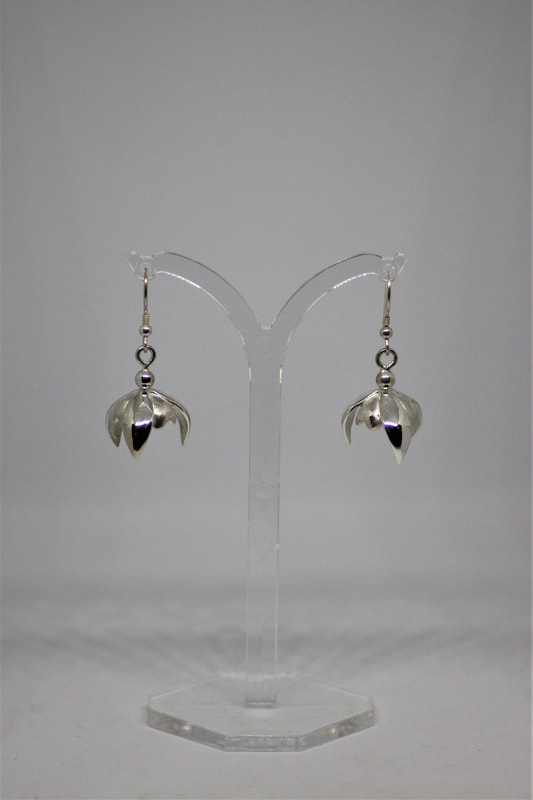
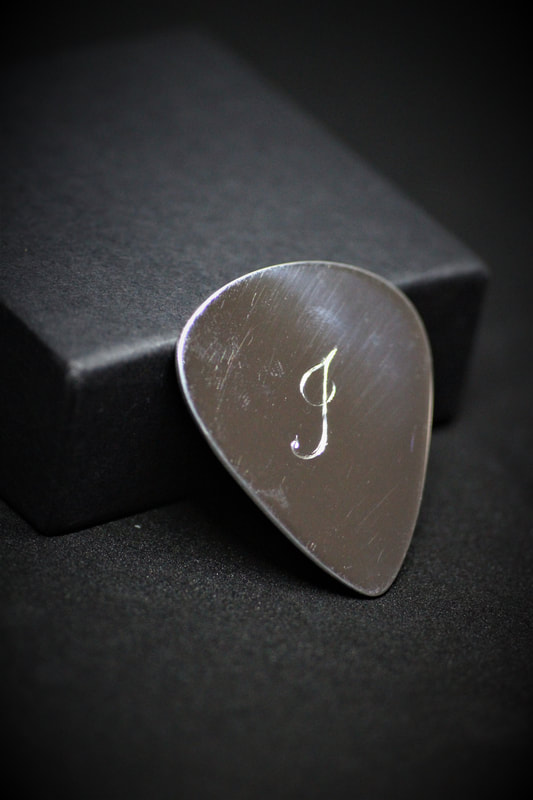
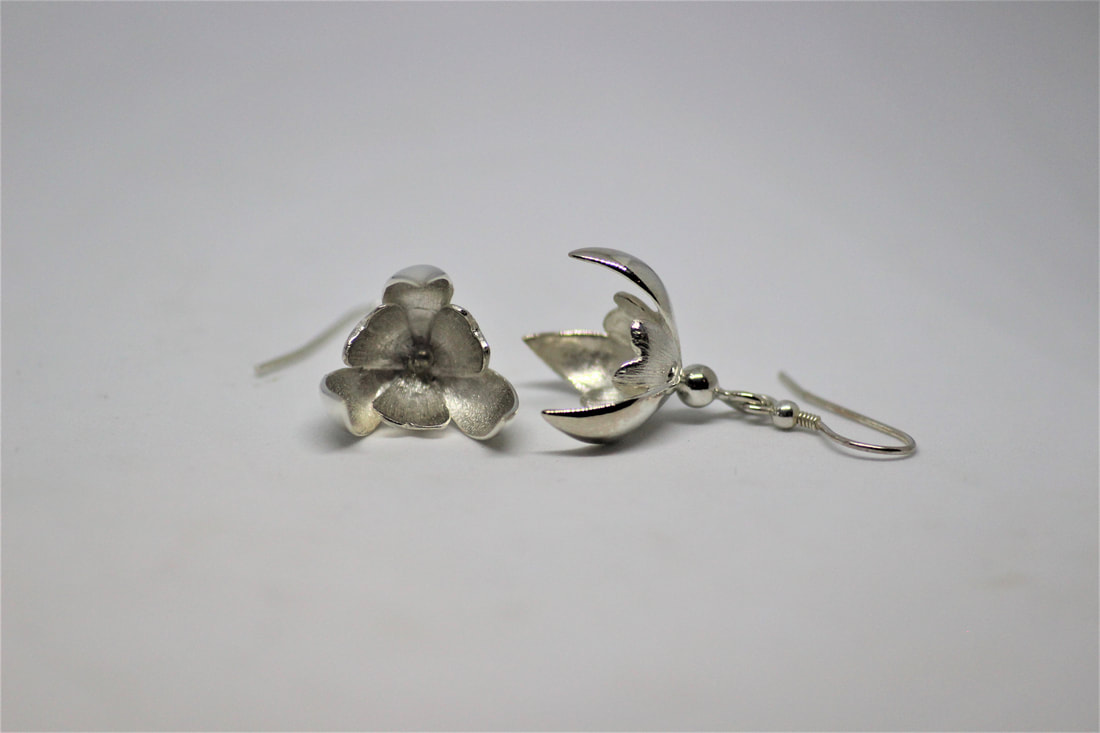
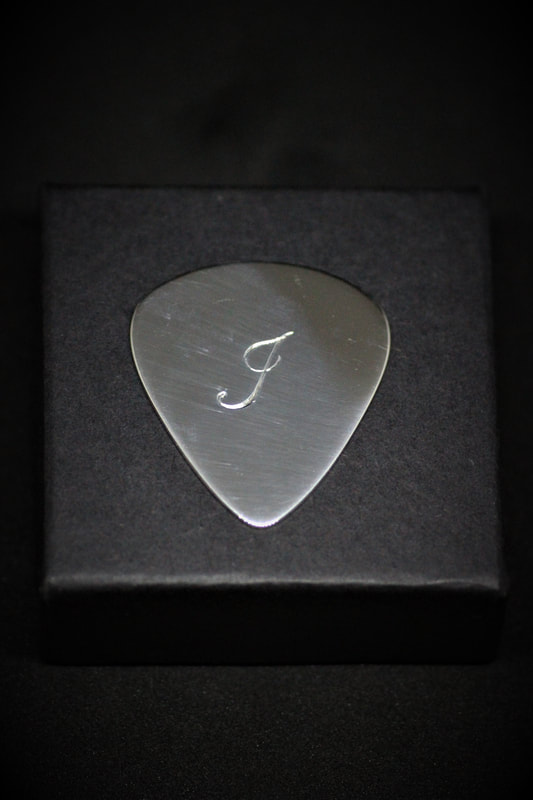
Snowdrop Earrings and Guitar PickIn our busy weeks we have been approached to make a few fun items of silverware, for example a personalised Silver Guitar Pick for a 21st birthday gift, in addition to a few rings and earrings. Stand by for pictures of our bespoke rings coming your way over the next month after our lovely clients have received them for special occasions.
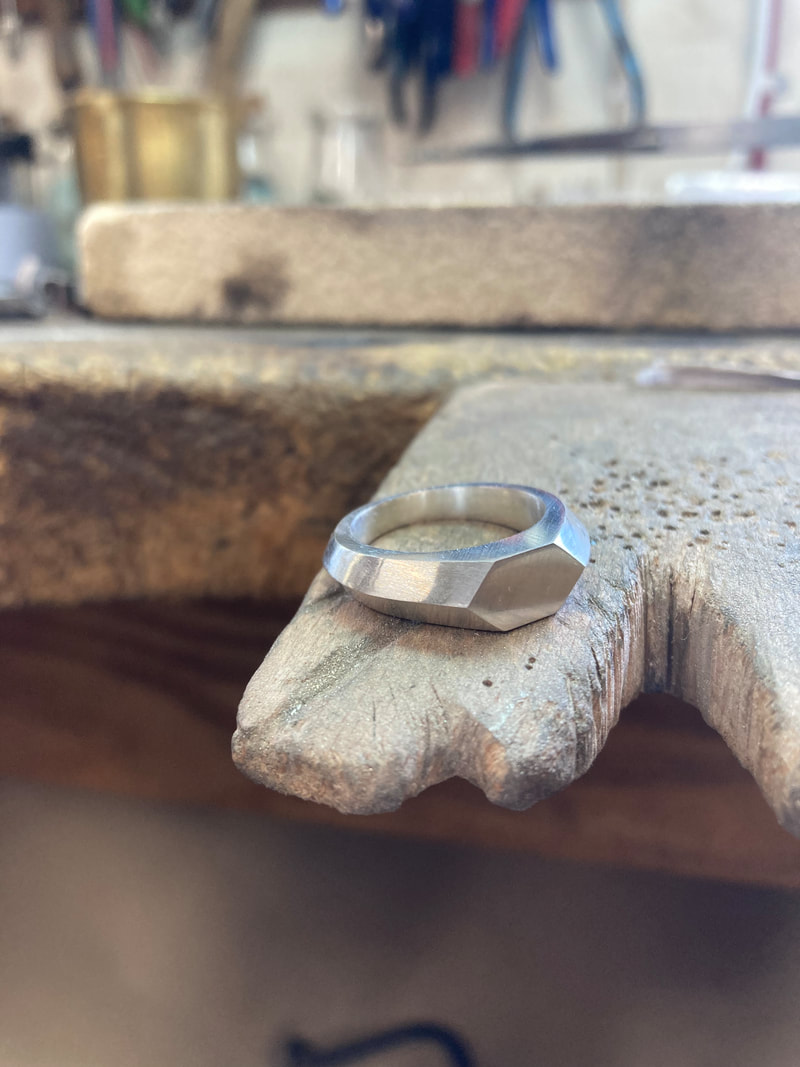
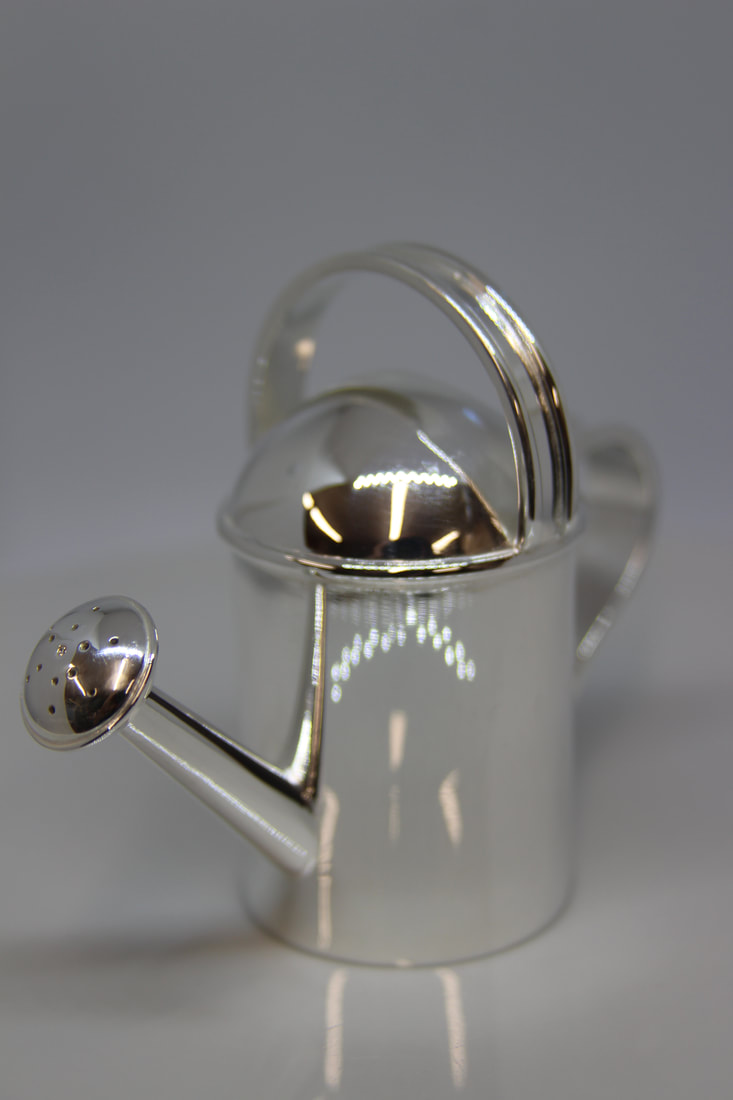
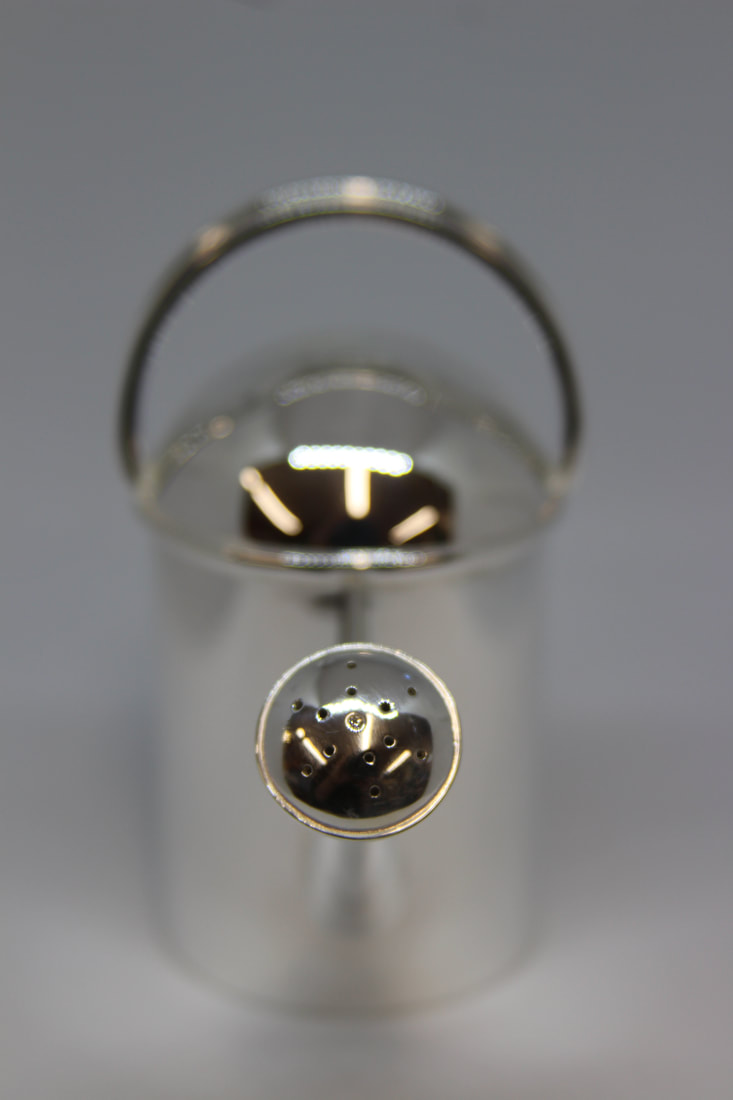
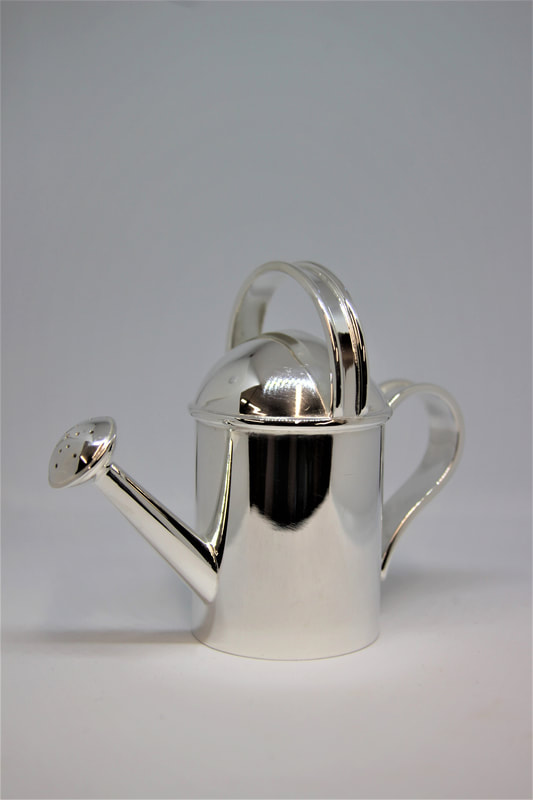
Hopefully I’ll be as controlled with a scorper as dad after lots of studying and practice. Miniature Silver Watering CanThinking of pieces that are enjoyable to create; at the end of last year we had the pleasure of making another one of our Miniature Silver Watering Cans for a customer, with a flush set diamond in the watering rose. We look forward to basking in more sunsets like this after a day at our hut and to seeing more of you all over the coming summer months on our beautiful working harbour. 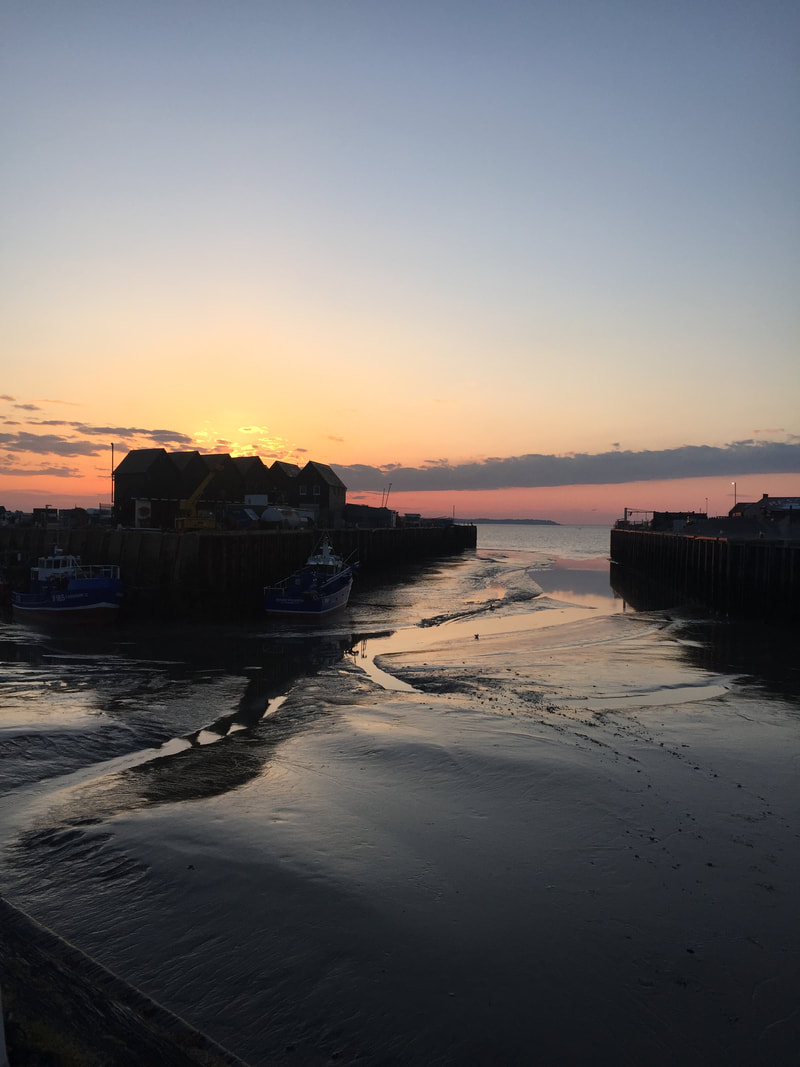 18ct White Gold and Diamond Stacker Ring
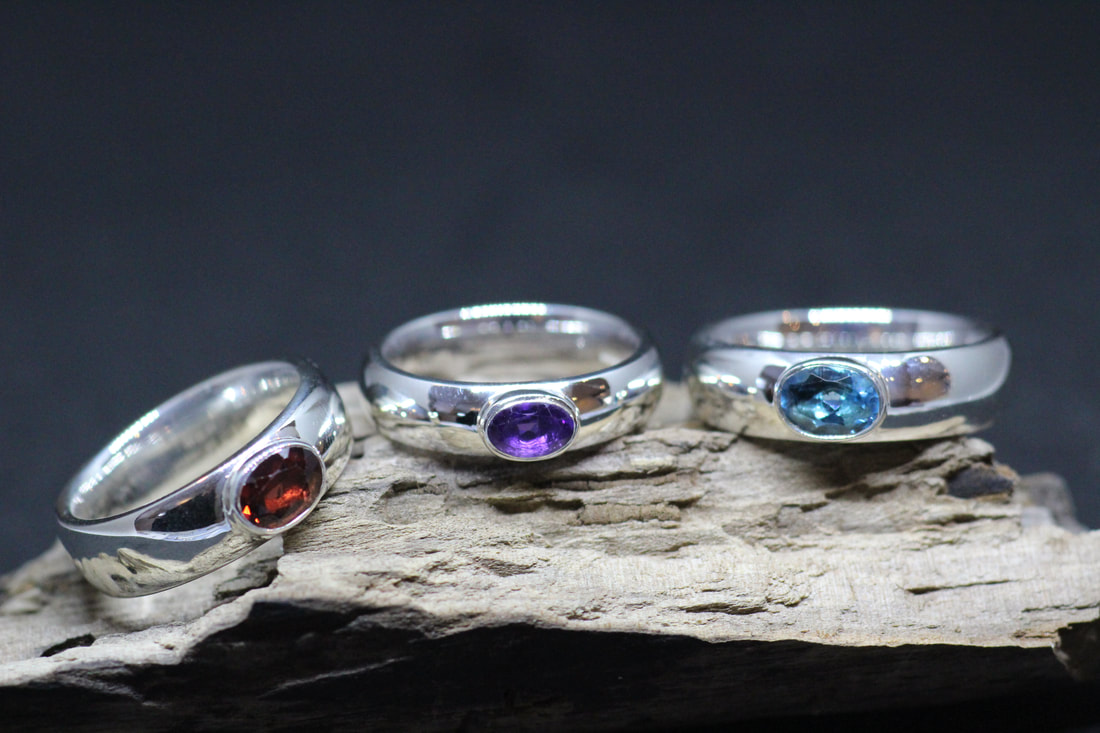
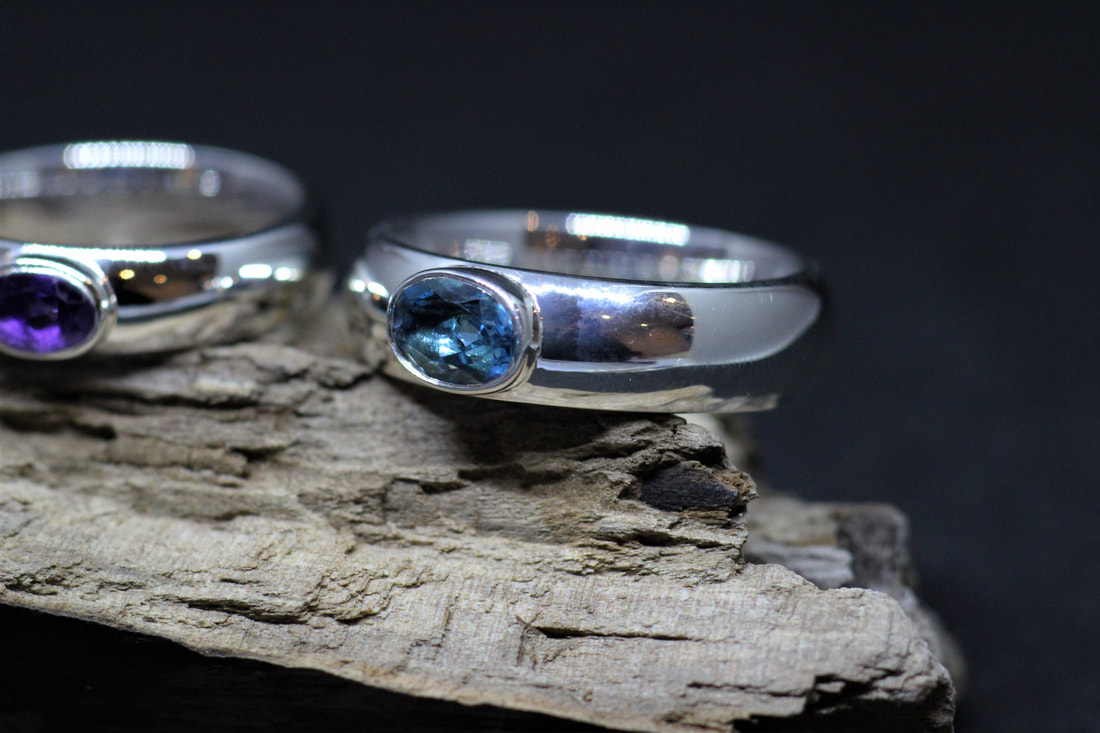
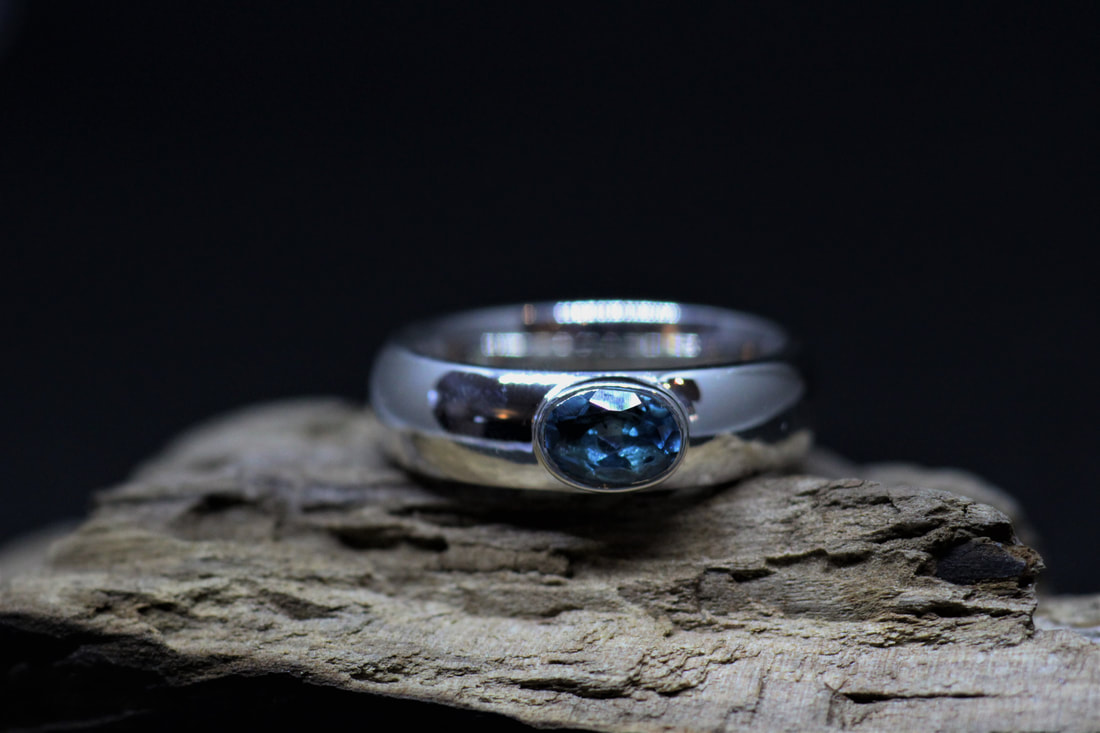
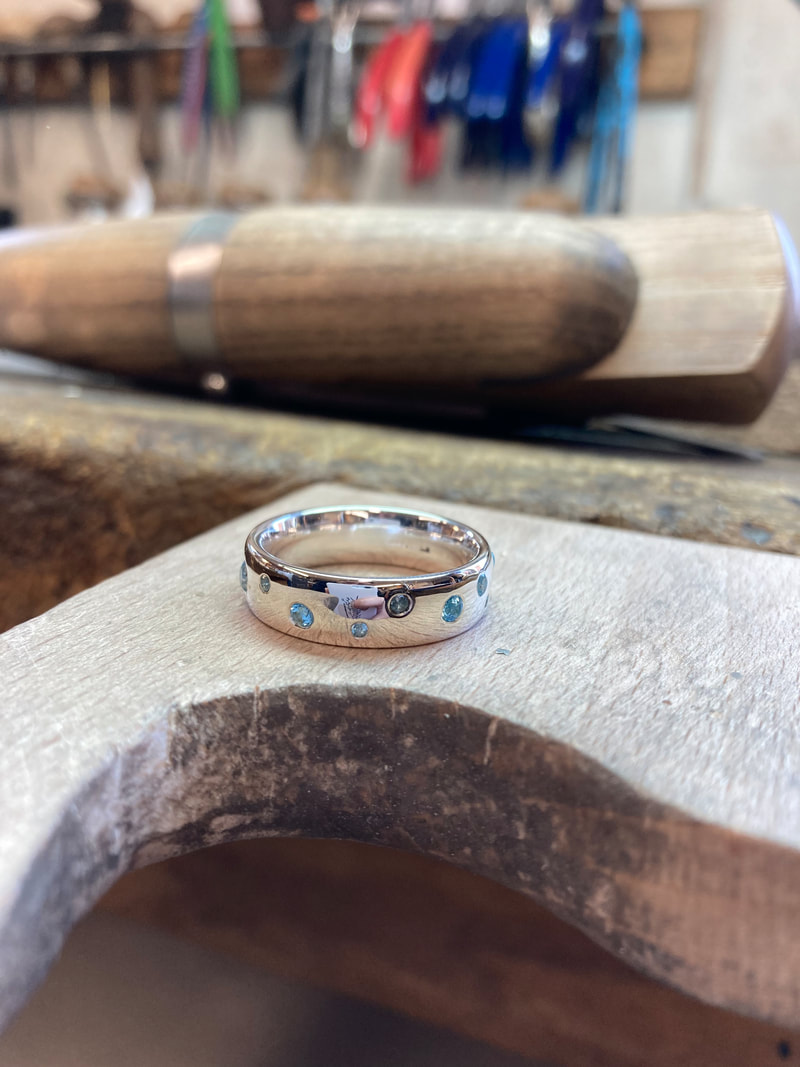
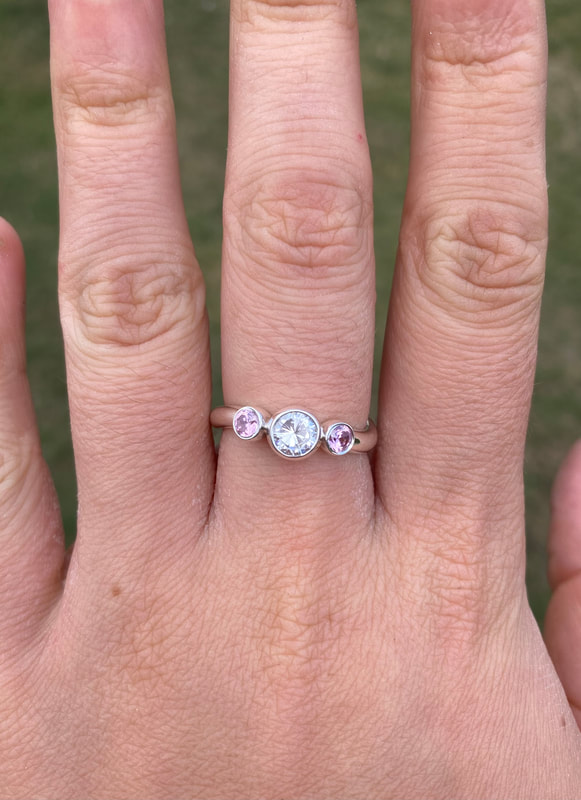
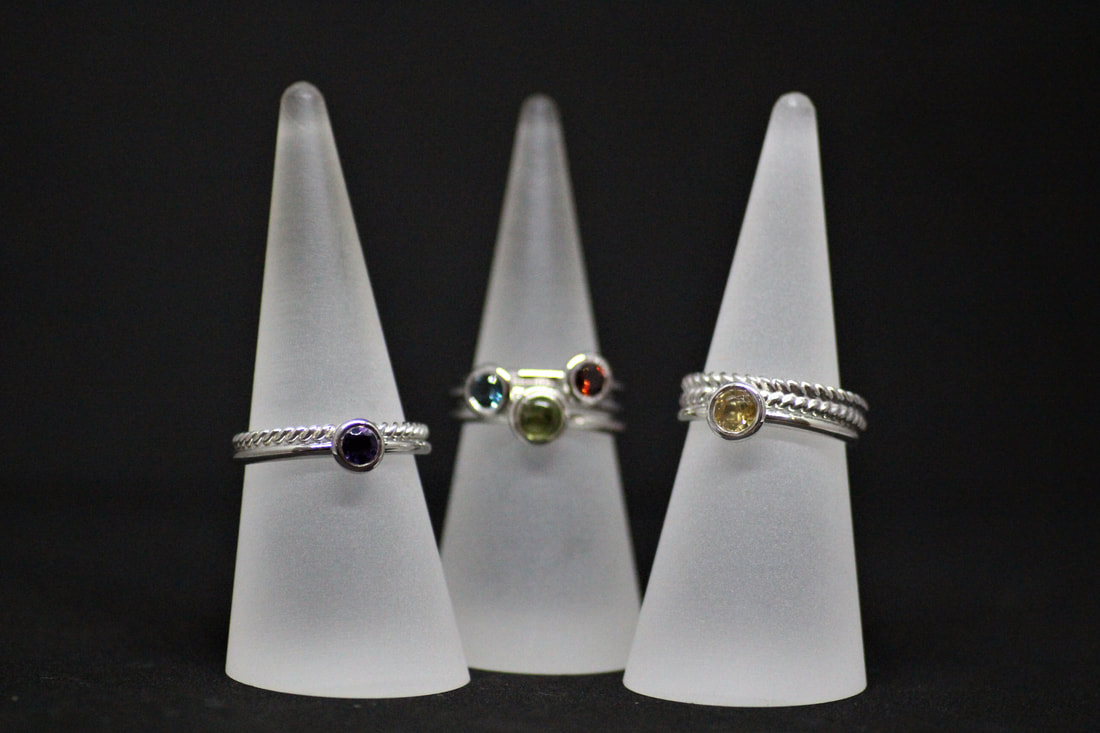
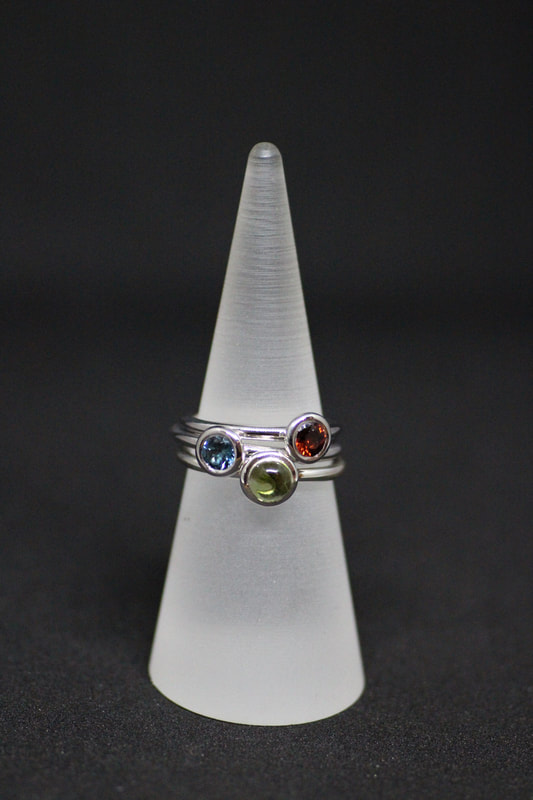
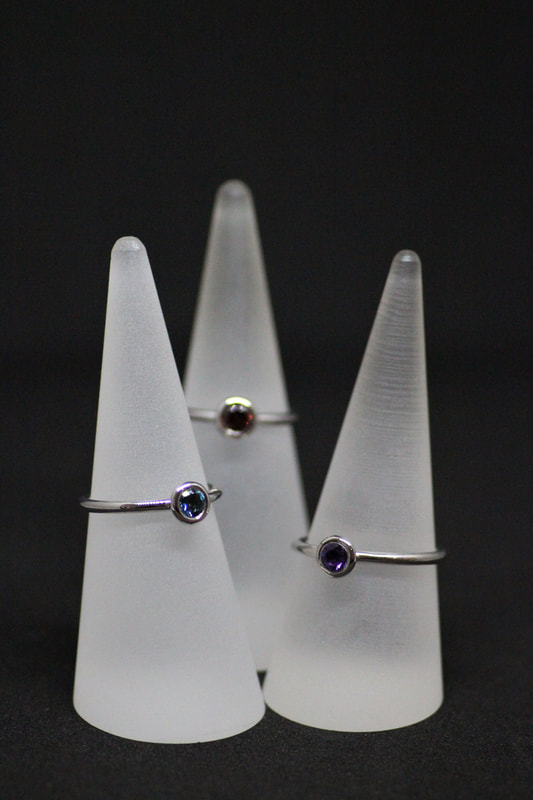
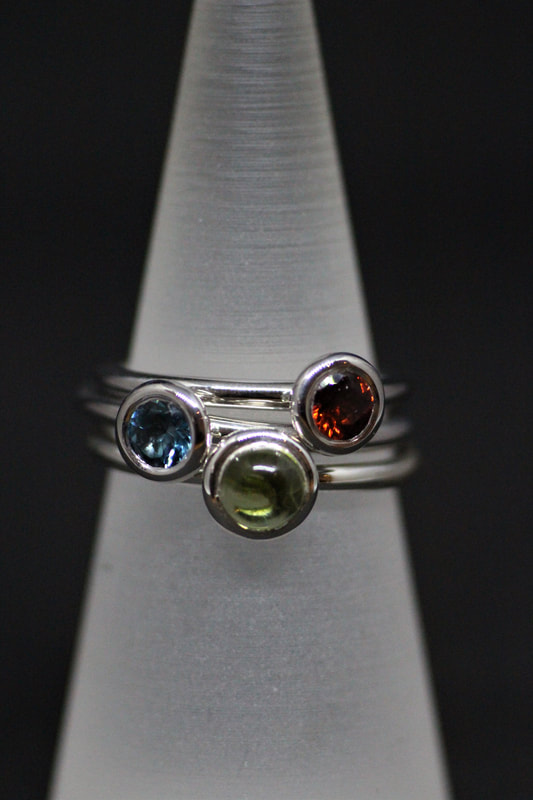
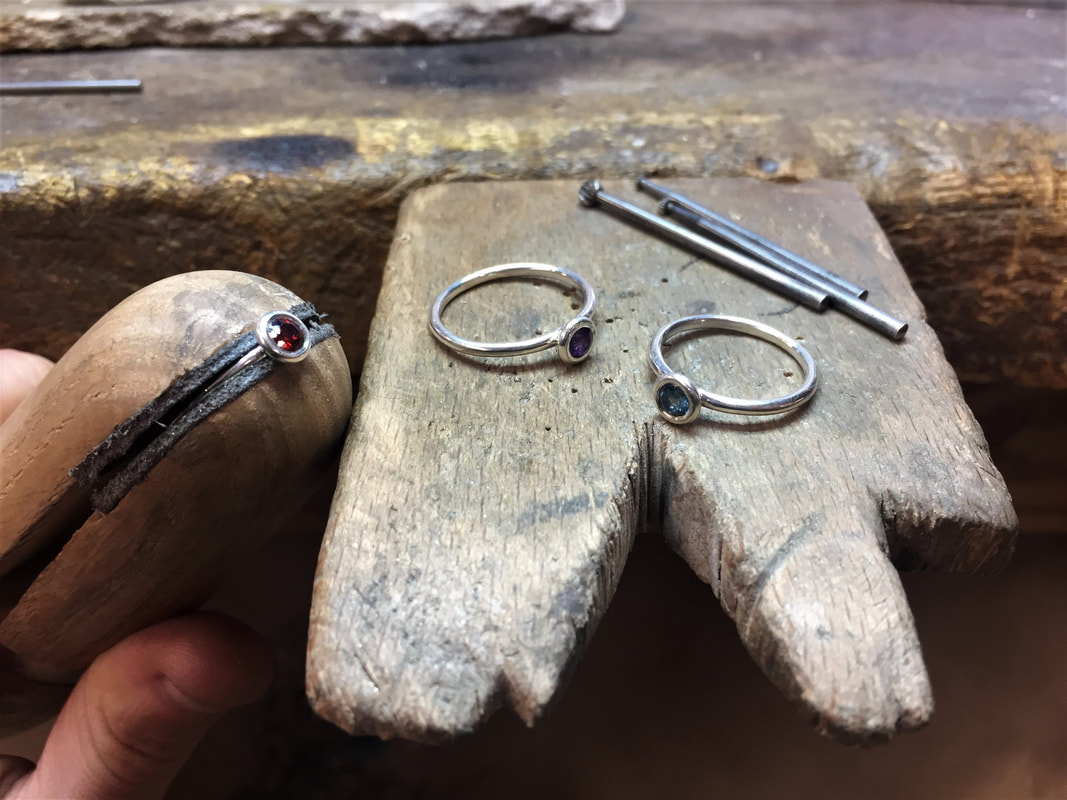
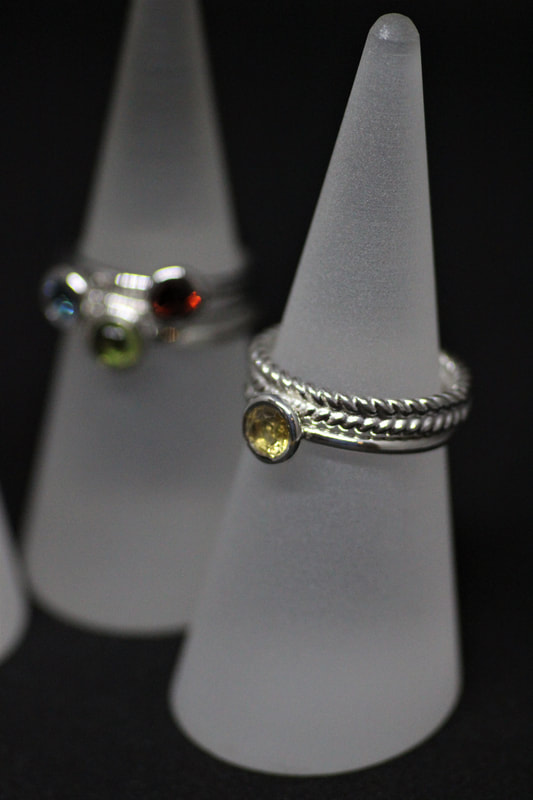
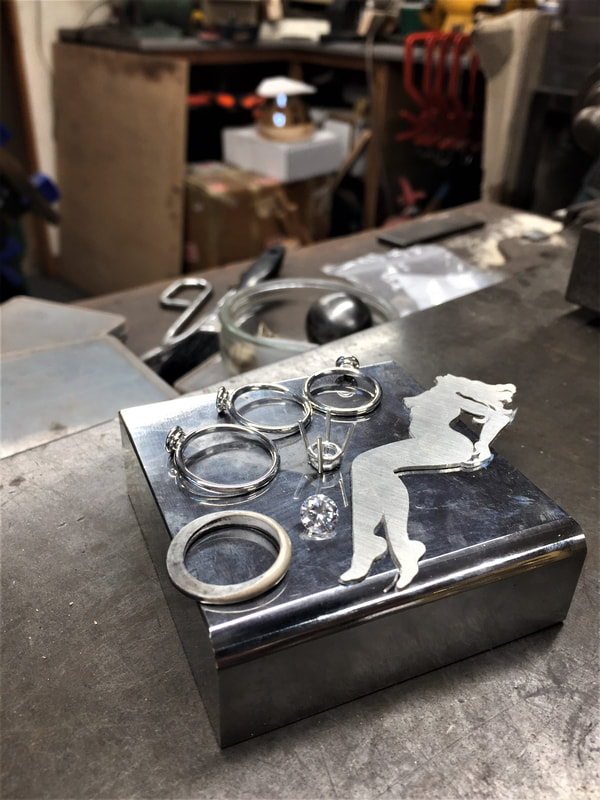
Stacking Rings with Coloured Stones
A mix of round cut and cabochon indigo amethysts, lime peridots, cranberry red garnets, deep London Blue Topazes, golden Citrines, and dark violet Iolites, are encased by a polo of silver. A set of these rings will flexibly enable you to mix and match the positioning of each ring to create a different aesthetic each day. Pair them delicately together or go crazy and stack them high! These will be integrated into our shop over the next few weeks when we are due to open. First practice making a Knife Edge Ring Shank and Four-Claw Basket Setting
Following a conversation with a good friend and fellow trades man, I will also create the knife edge using an alternative and quicker method rather than hammering the shank to a knife edge as I did this time. This will also stop any impressions from my misplaced hammer strokes into the shank, which made it difficult to clean up. On to the next one, and hopefully improve each time!
I am fine though, my clothes were the only ones injured! Things from my workbench this week
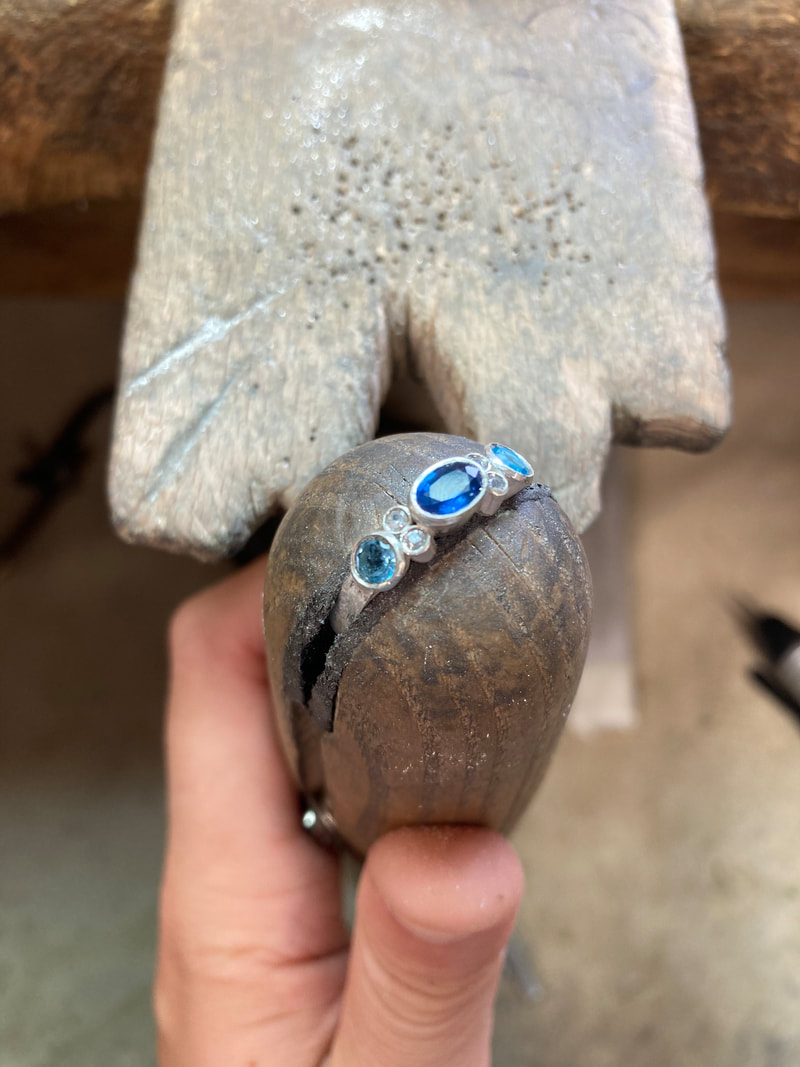
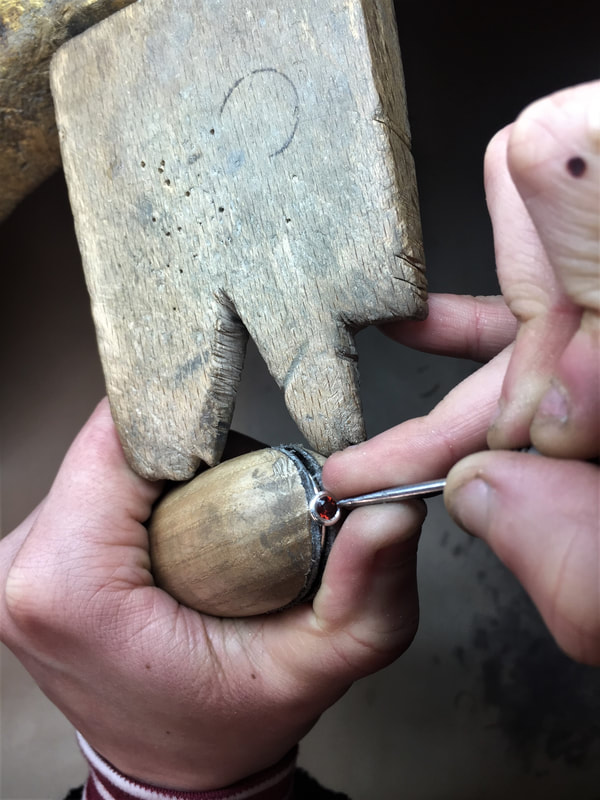
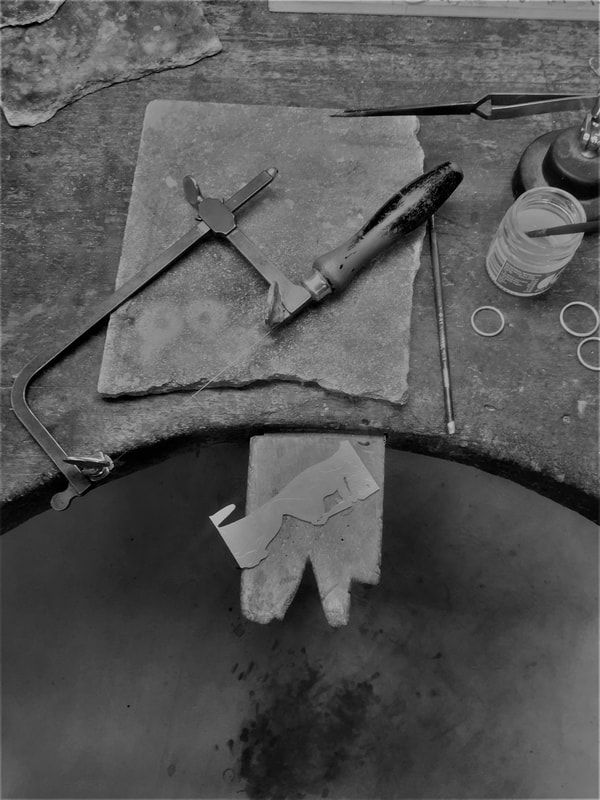
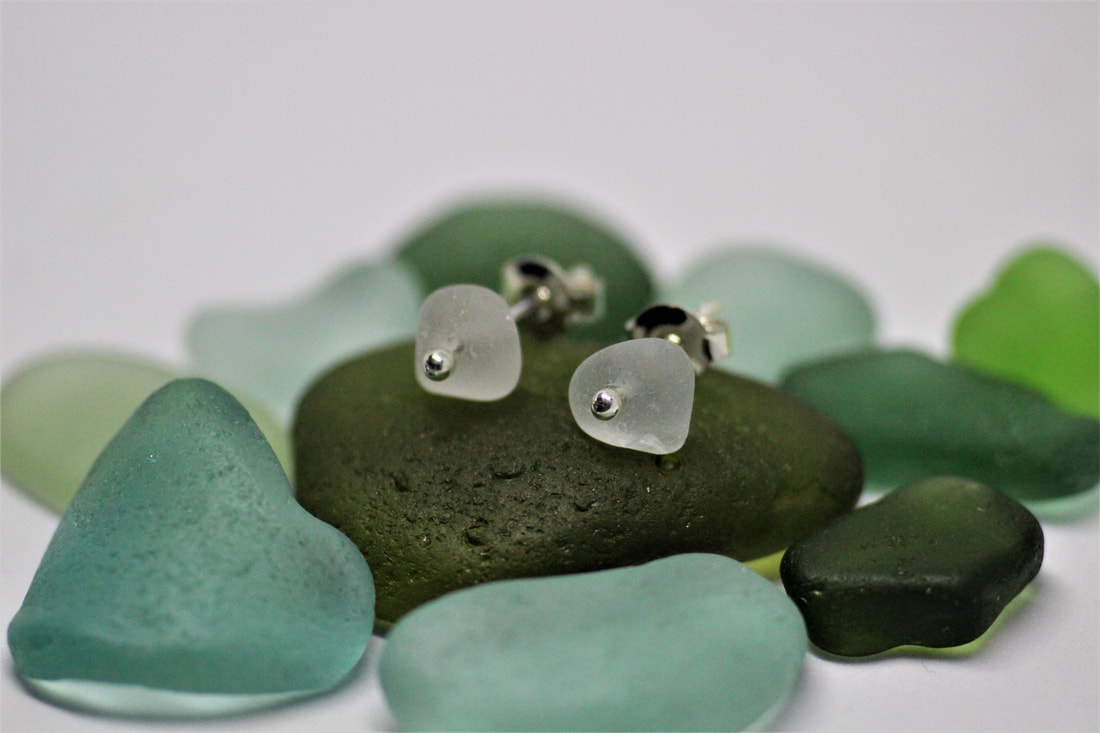
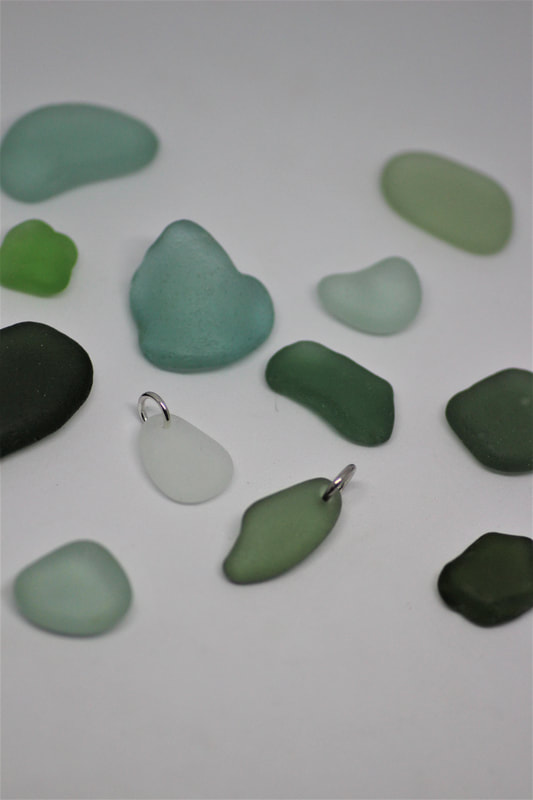
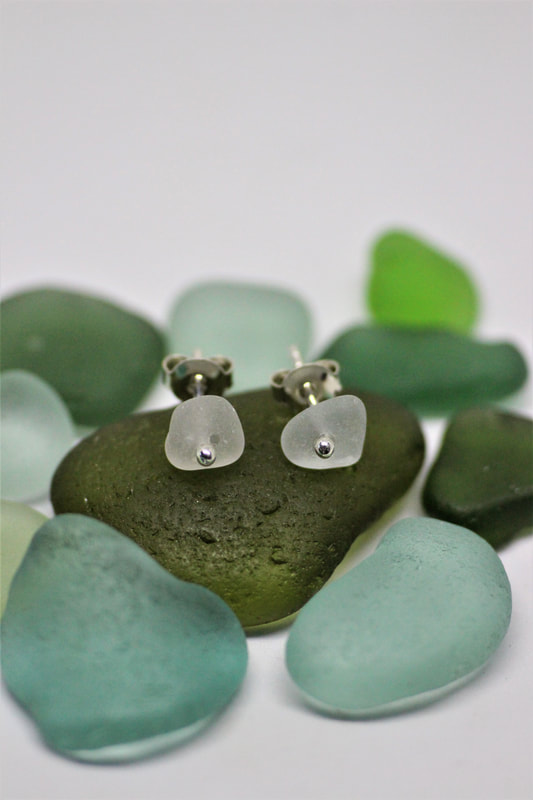
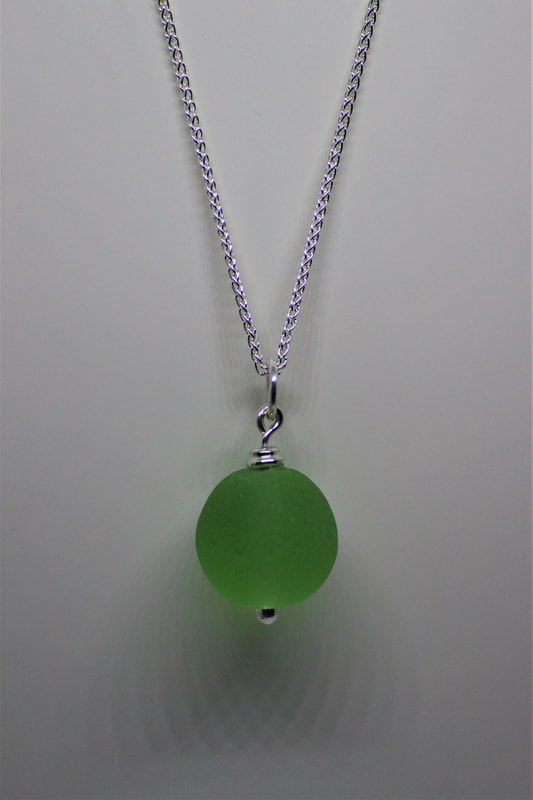
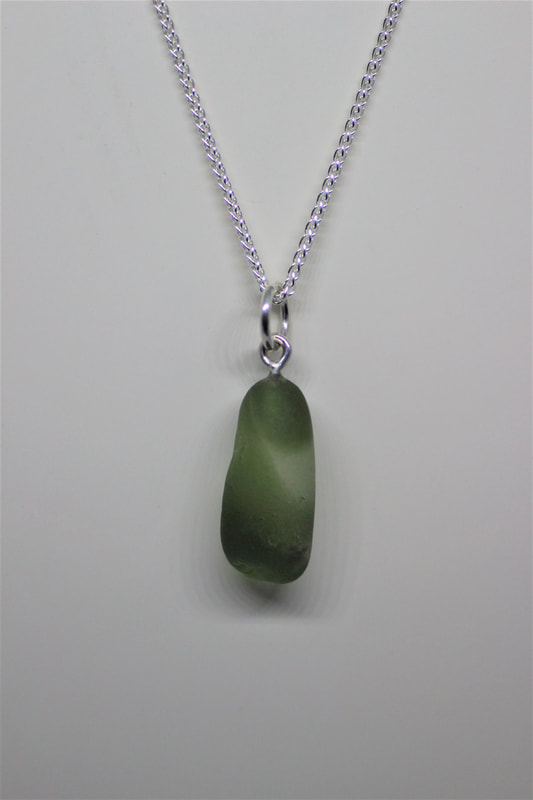
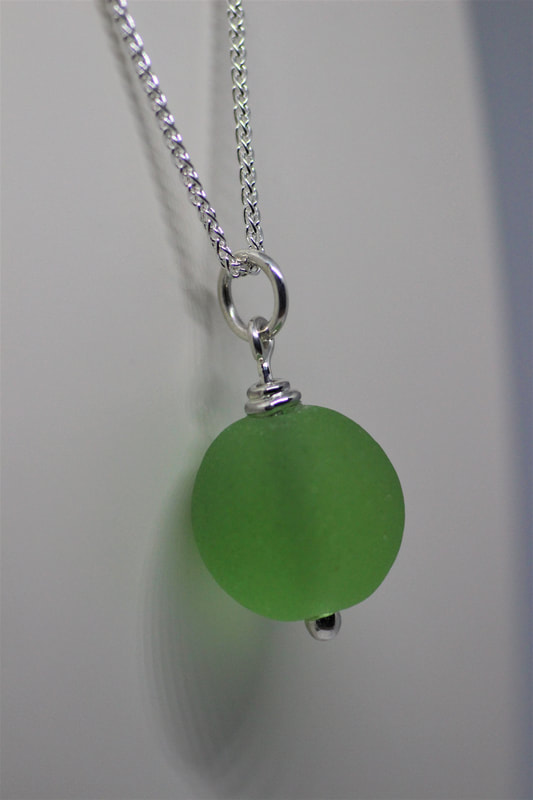
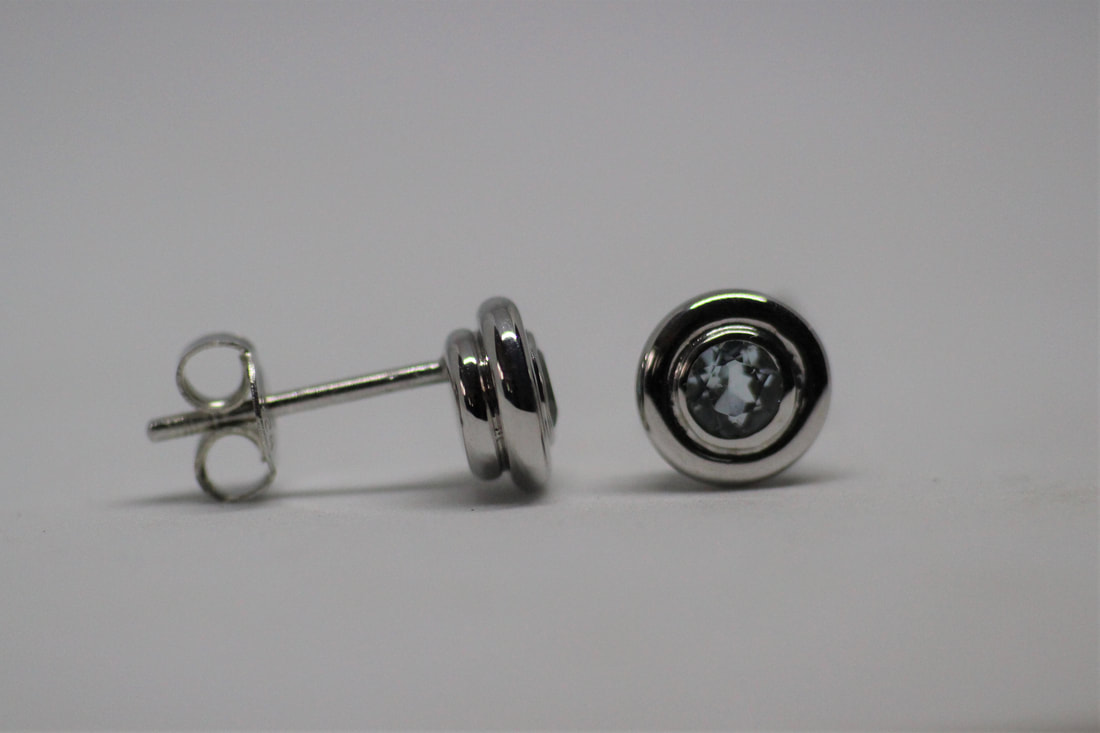
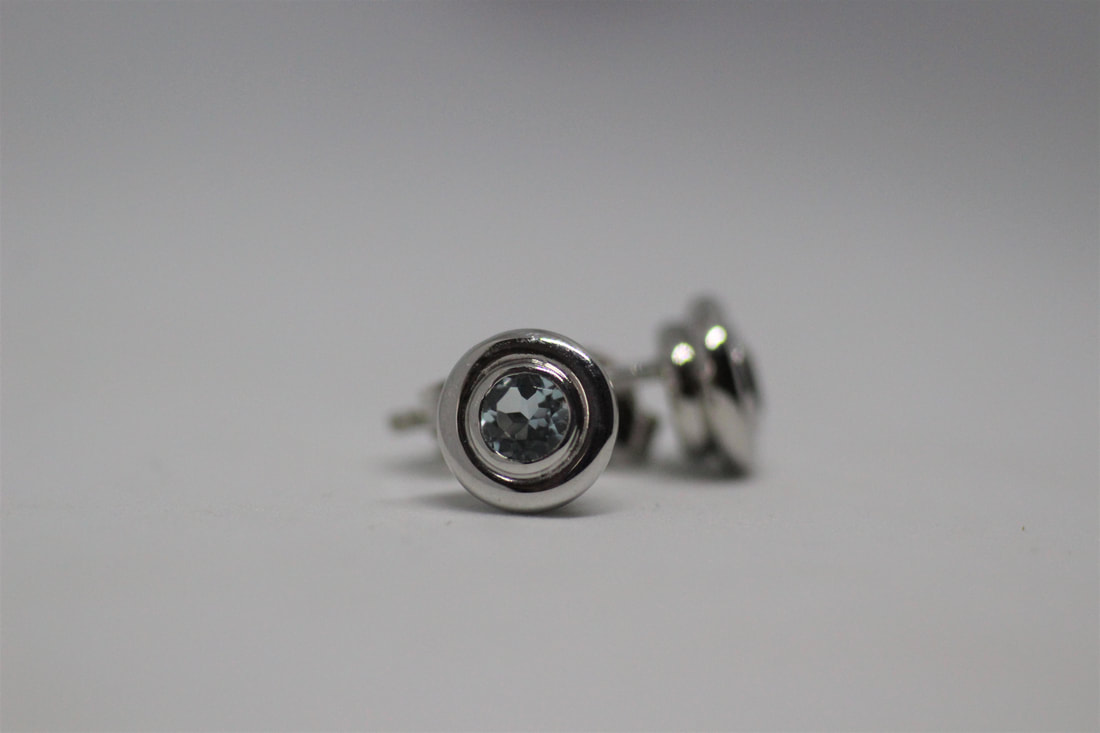
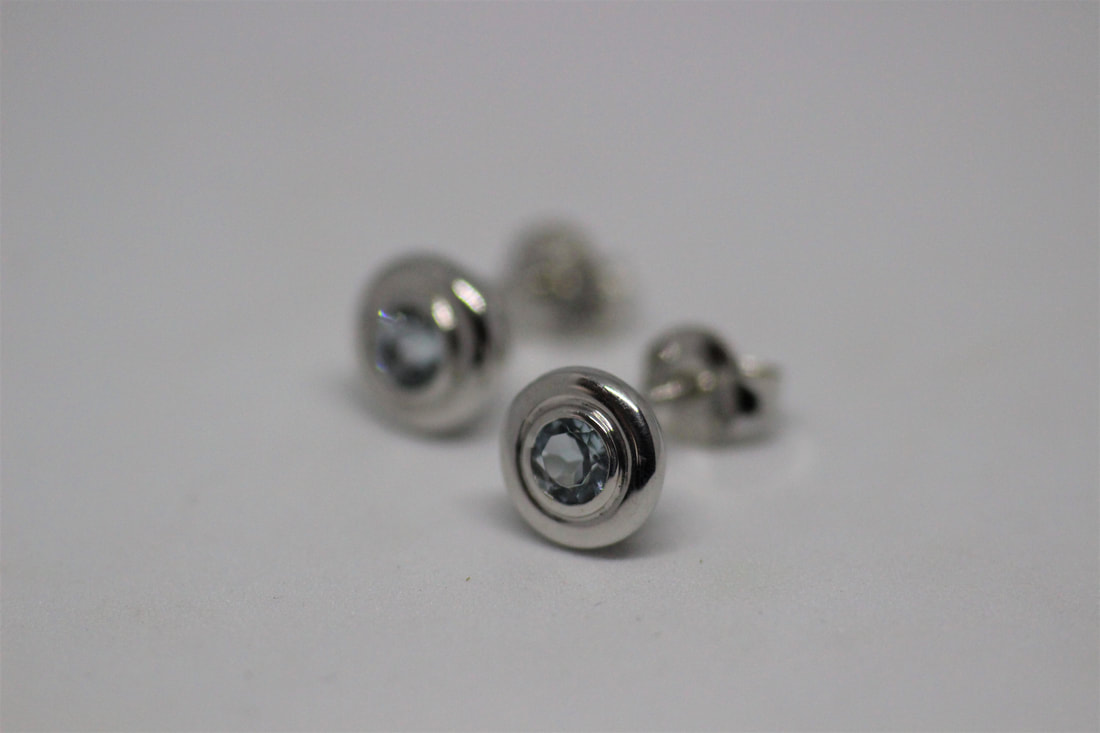
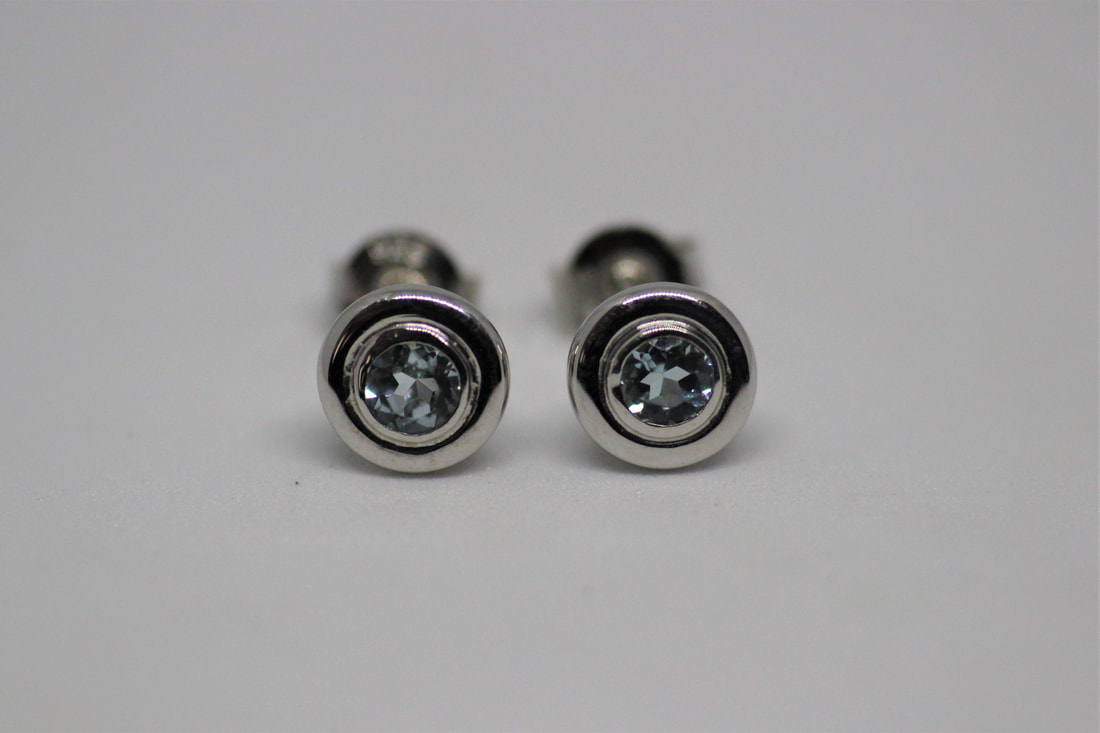
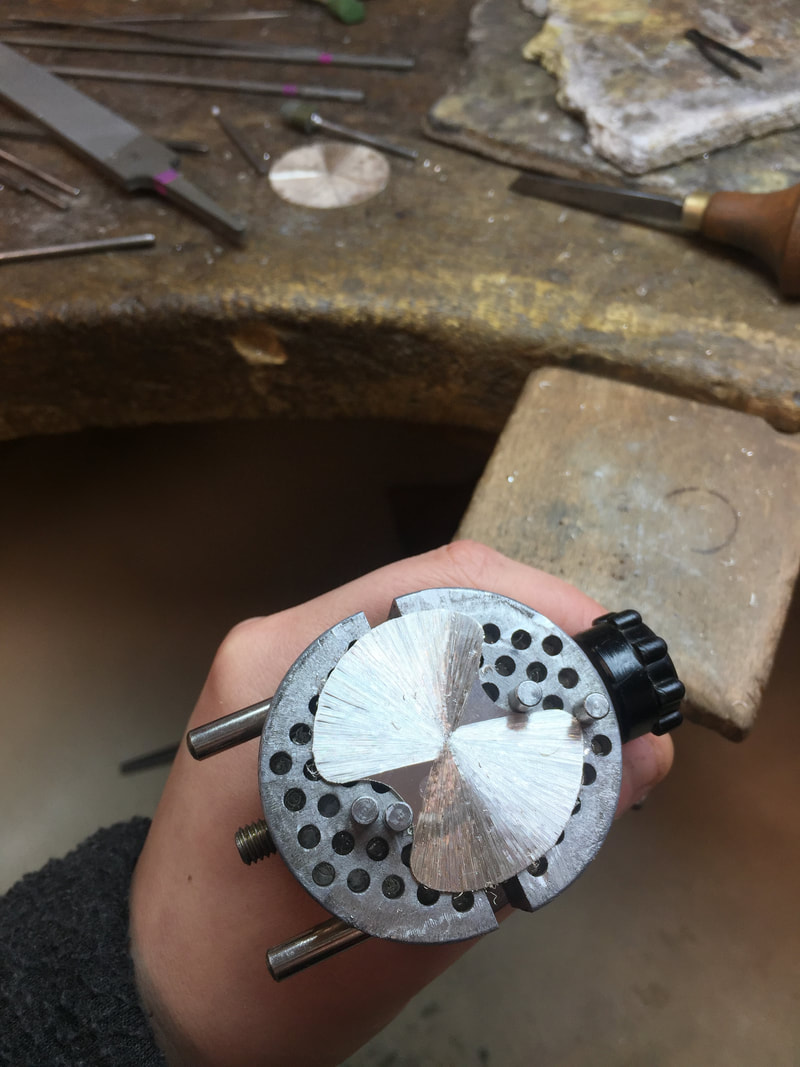
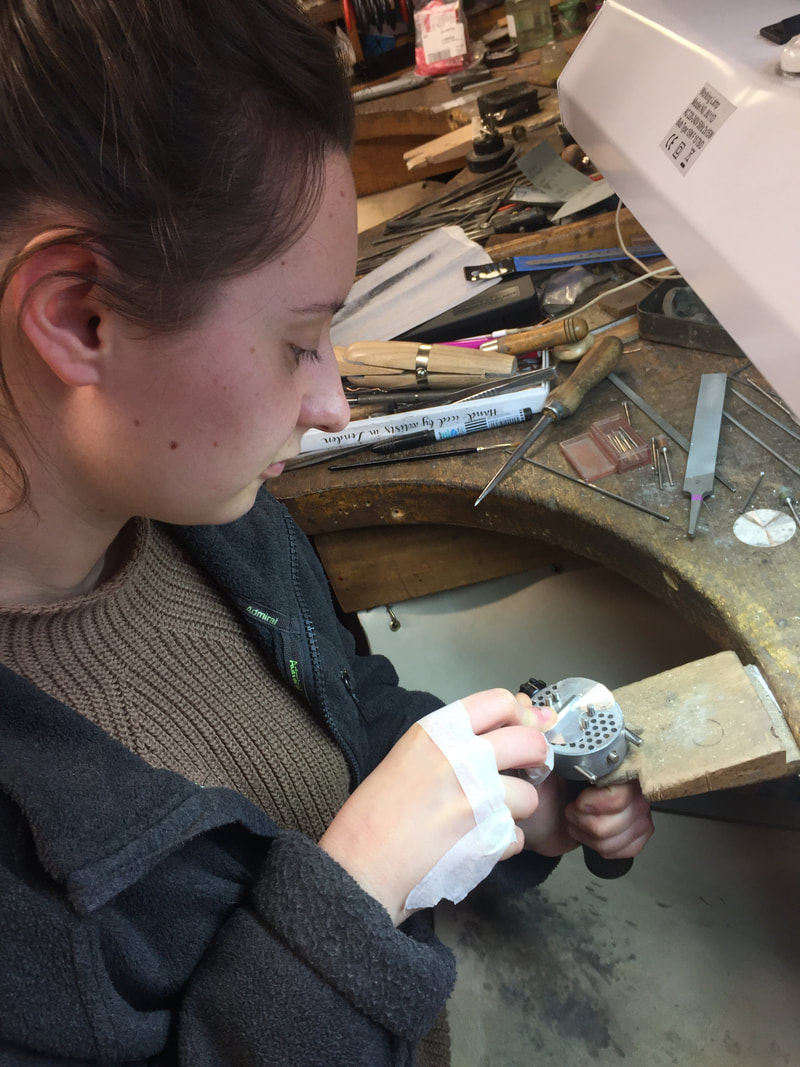
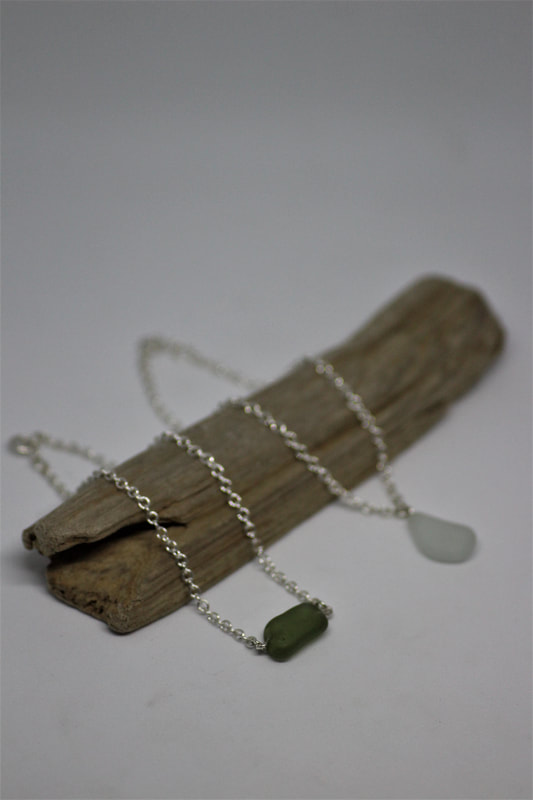
Originally the four-claw gallery setting for a ring was intended it for a 5mm Round Swiss Blue Topaz, however I made a mistake with my measurements, having not made one before, and it is now ready for a 7mm round stone instead. Making a ring shank that wasn’t simply made from round, square or D-shaped wire was also unfamiliar to me. So I wanted to make a tapered shank that would suit a taller setting and lend itself to focusing into the stone. It is still simple and mastered by many although it took me three attempts to make one I was happy with! Starting with a 2 x 3mm D-shaped skank, soldered and rounded up, I hammered a taper into the ring with the solder seem at the shanks thinnest point and therefore the top of the ring. I wouldn’t normally position the seem anywhere else other than directly at the bottom of the ring, however on this occasion I will be piercing through the seem for my setting. Annoyingly this D-shaped wire didn’t achieve the height I needed for the setting, so the solution to achieving a higher taper was to use square wire instead, which has more volume of silver in the same length. Finally with a more successful ring shape I can continue to finish the ring next week. Jewellery from the Sea - Marbles and Two-toned sea glassIn the few moments of down time in the workshop I have been whipping up some sea glass charms and a pair of sea glass studs. I was particularly interested in a green piece of sea glass with clear swirls contained within and a pure apple green marble we picked up from our morning walks along the shore. A little glimpse into what we have been making at the bench over the last few of weeks. Sterling Silver Aquamarine Studs
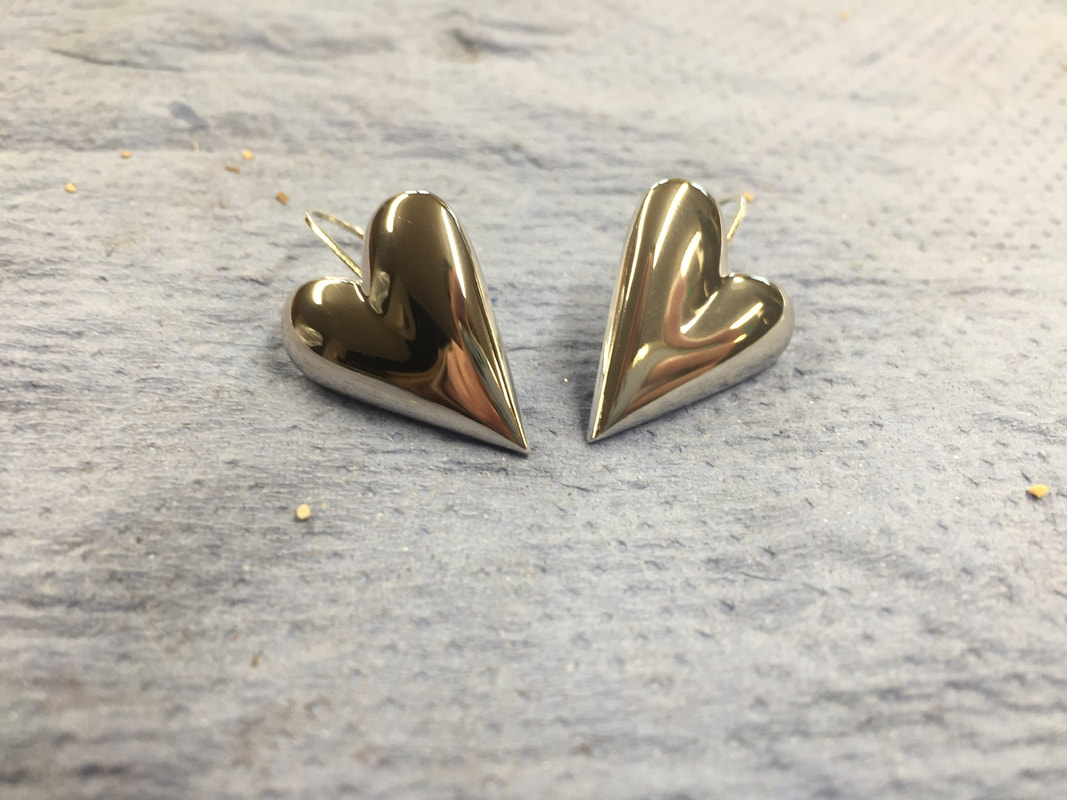
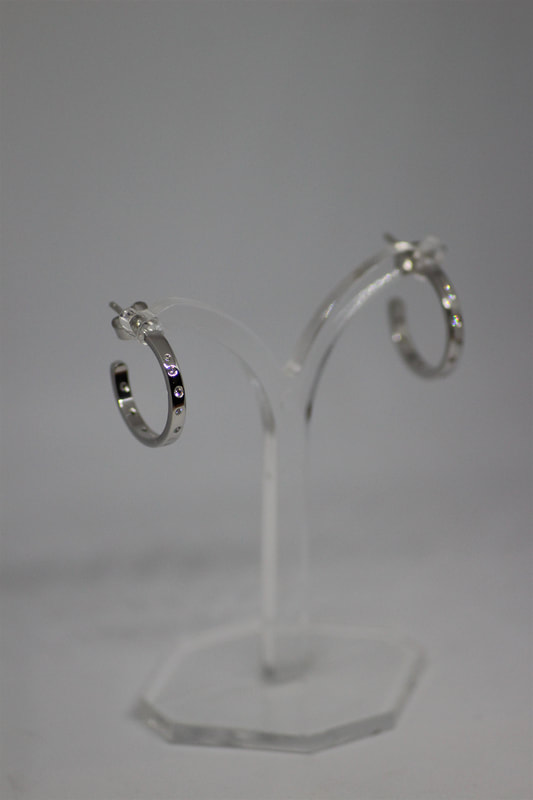
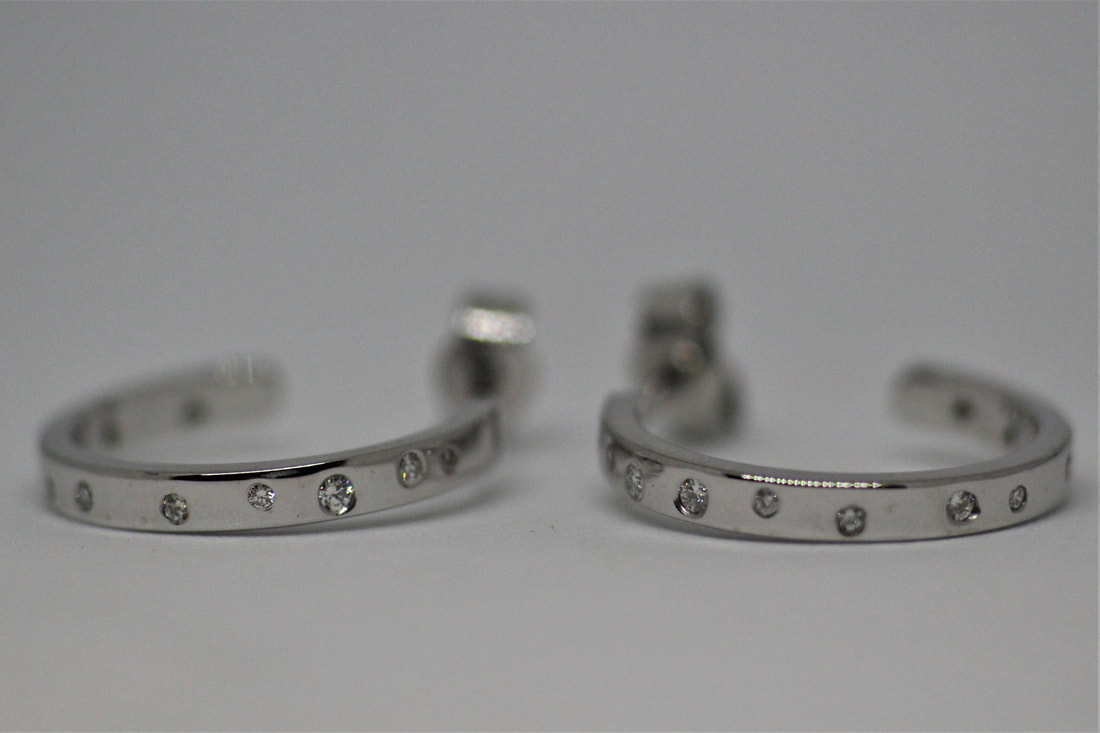
Twenty One Diamonds to celebrate Twenty One YearsA playful pair of 9ct White Gold Hoop Earrings scattered with a total of twenty one flush set round diamonds ranging from 1mm -1.4mm
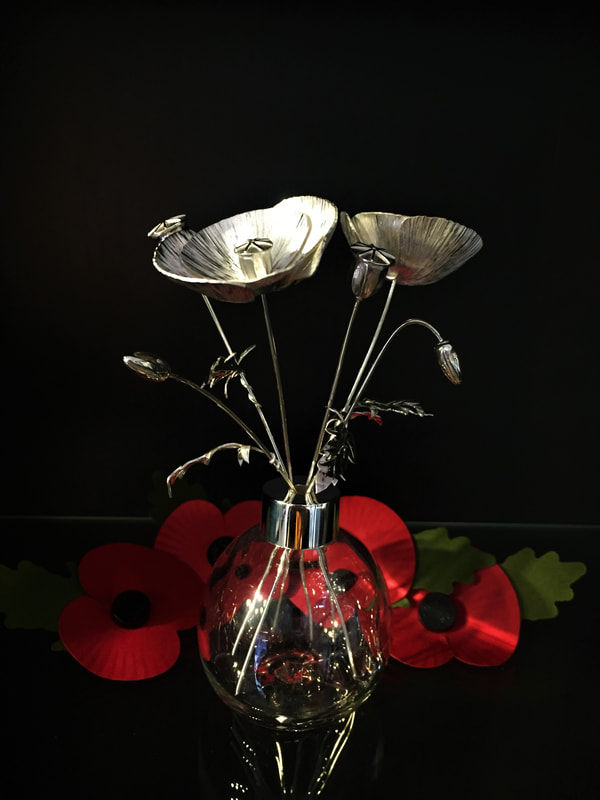
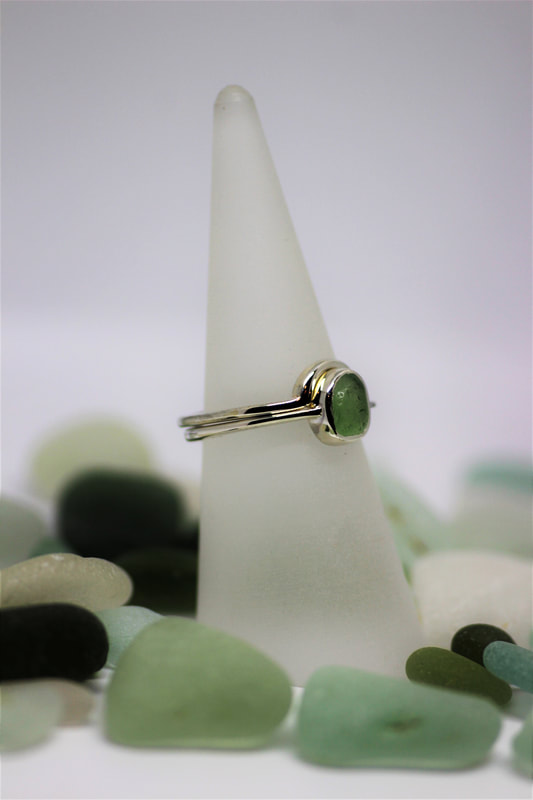
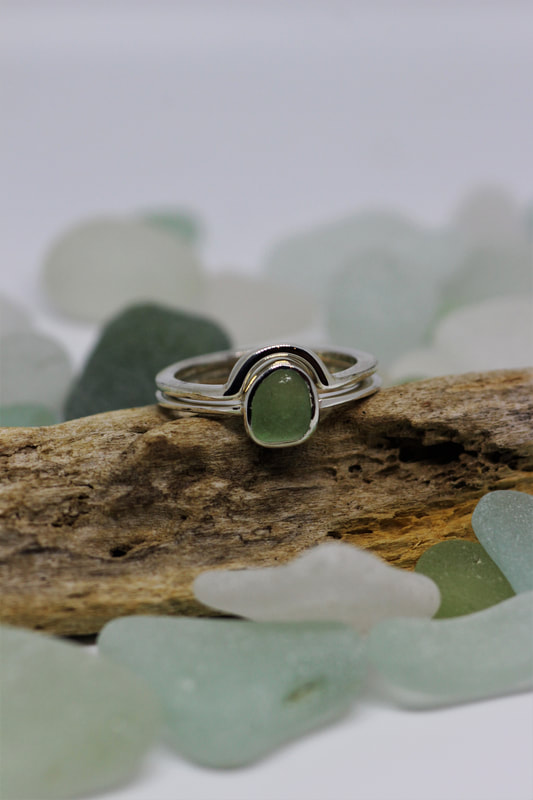
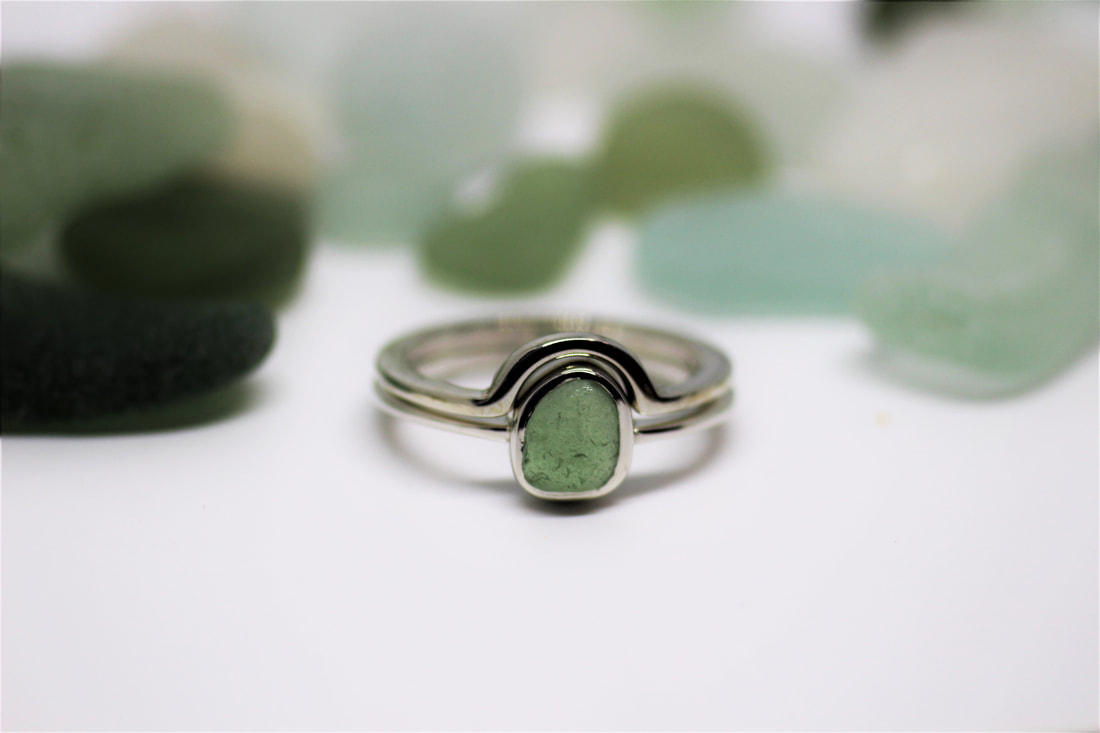
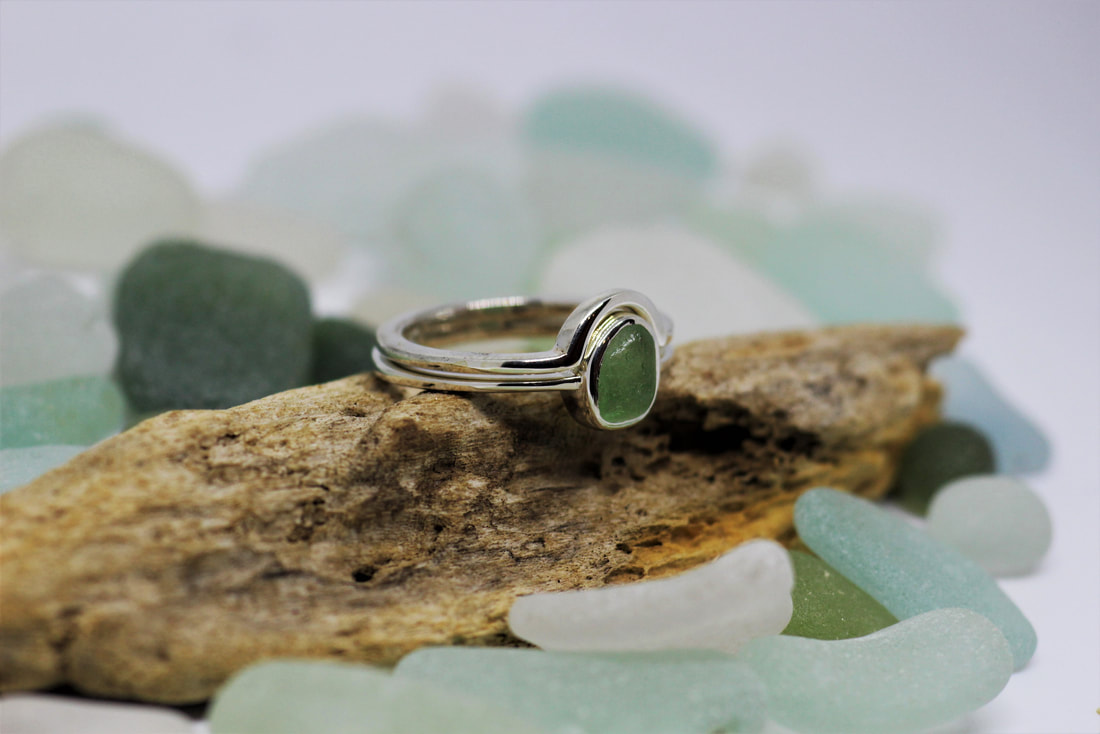
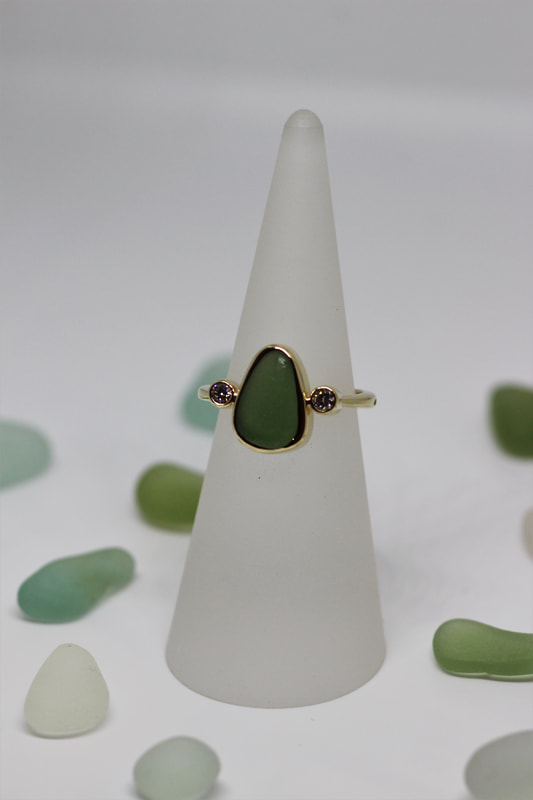
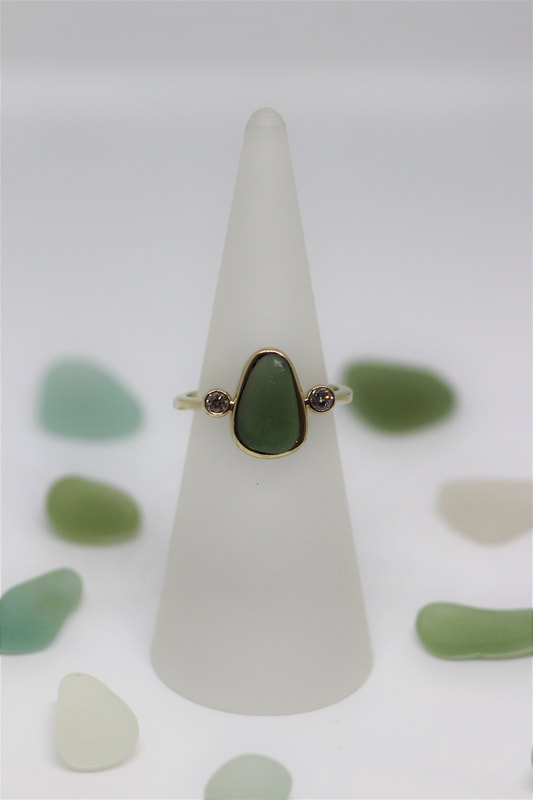
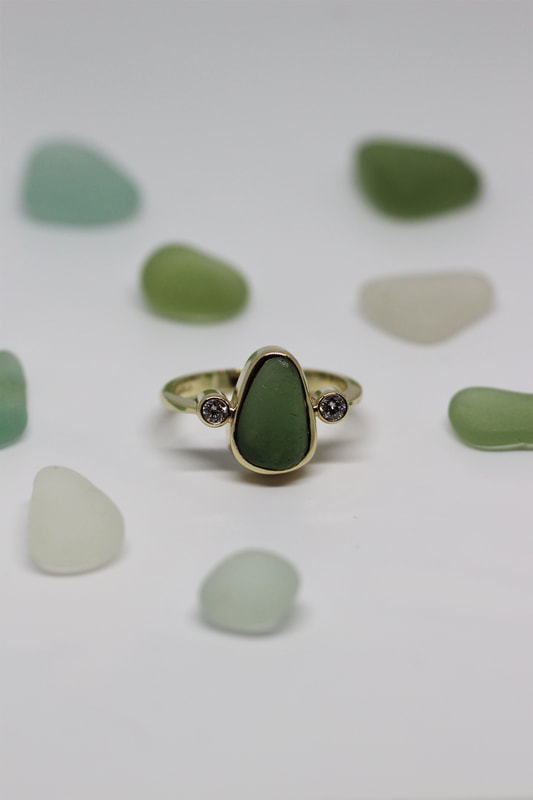
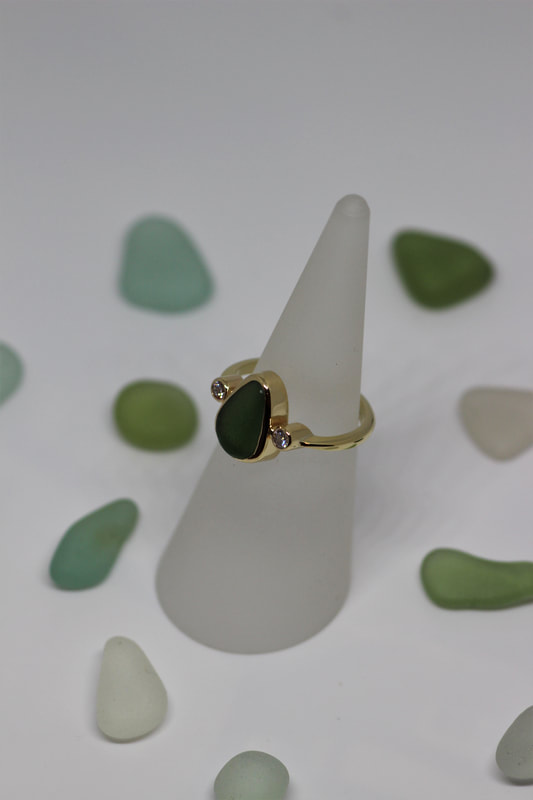
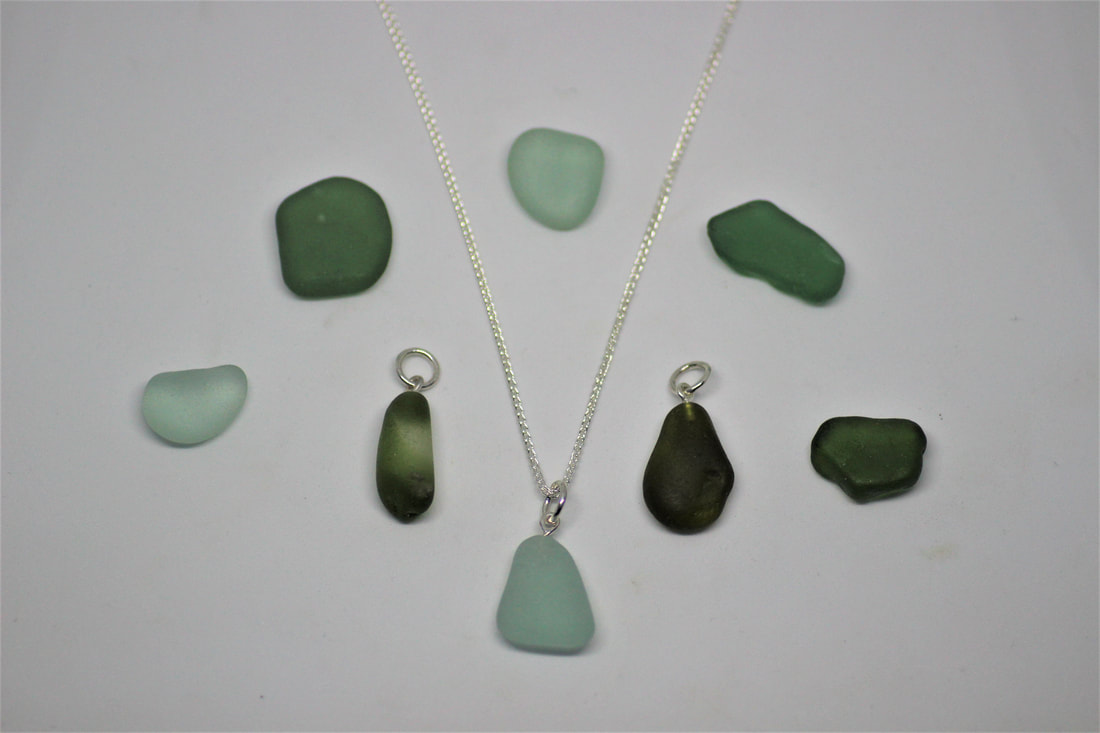
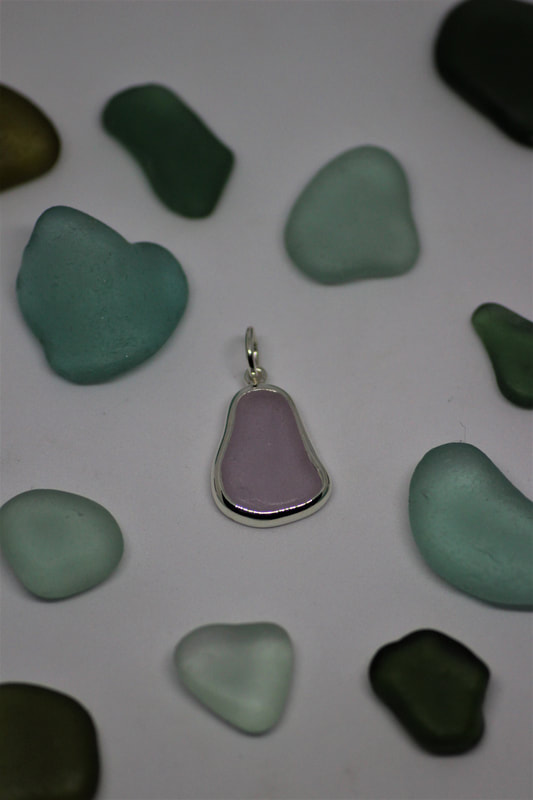
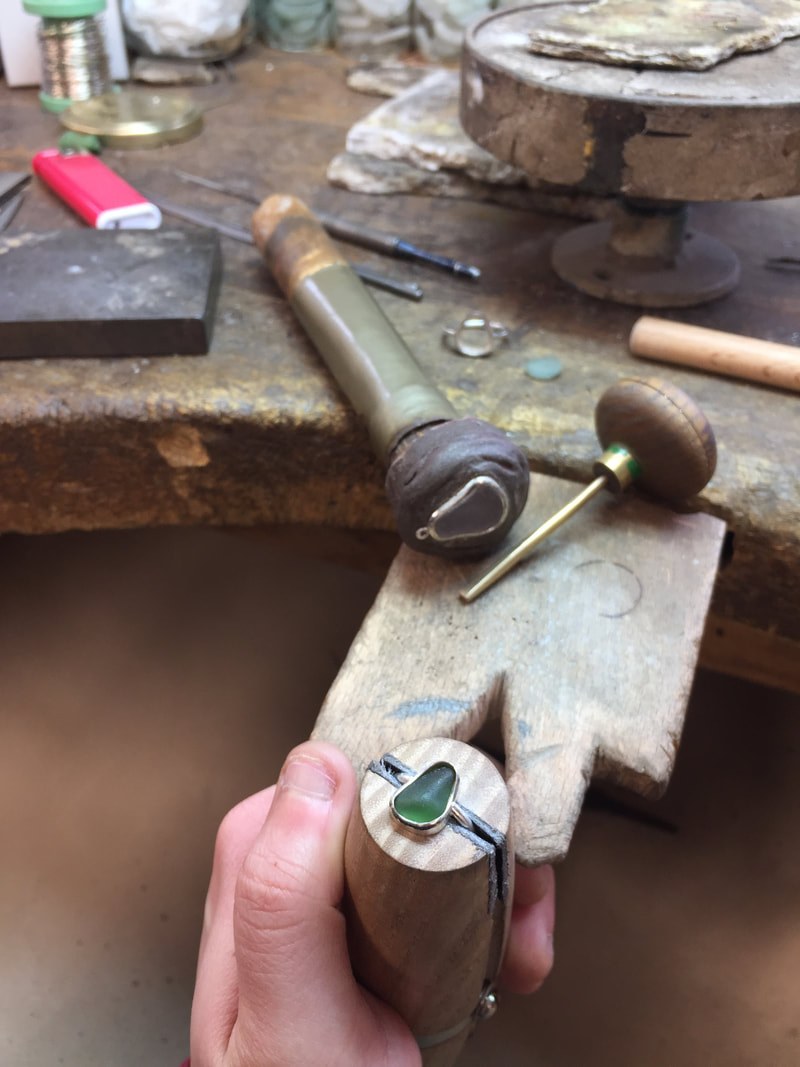
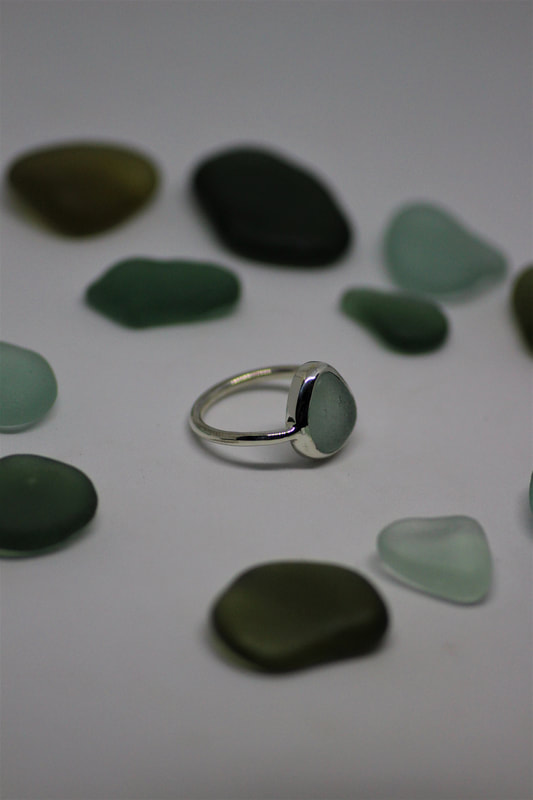
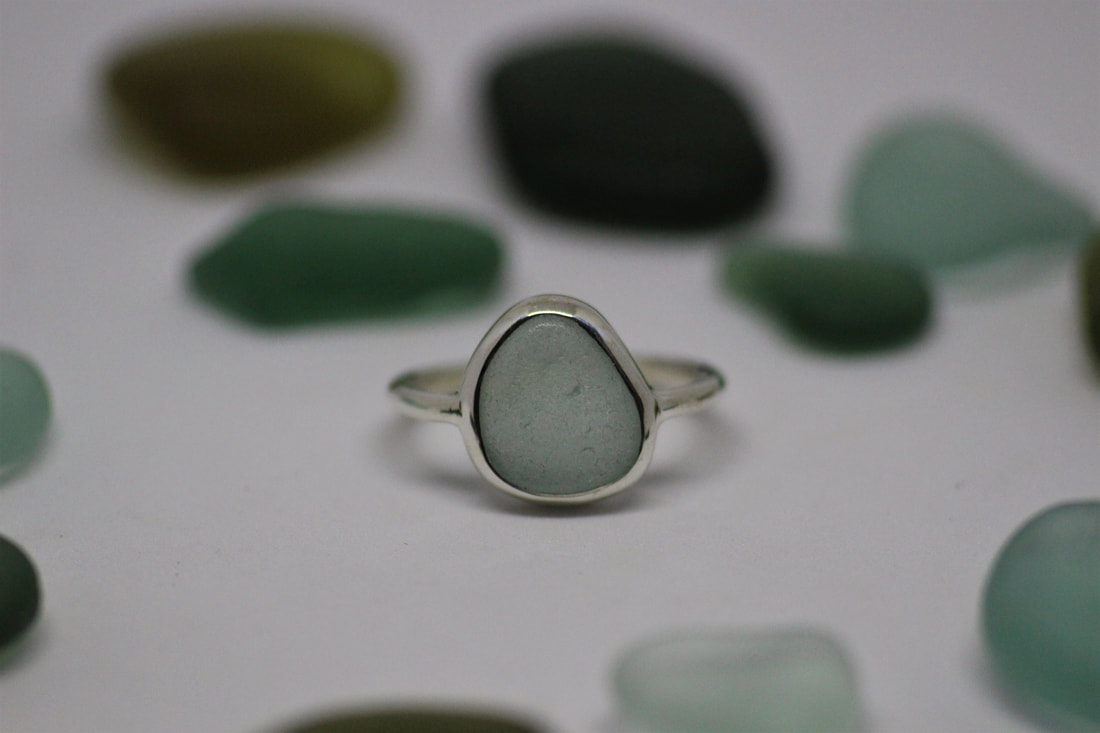
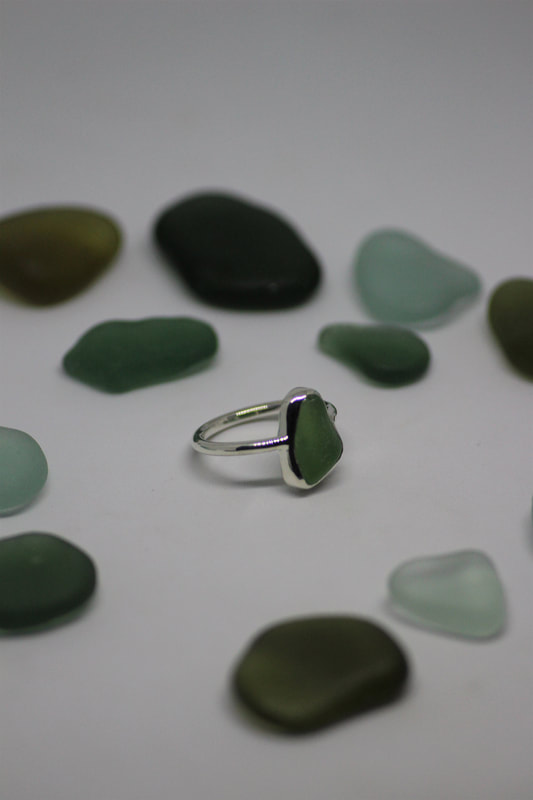
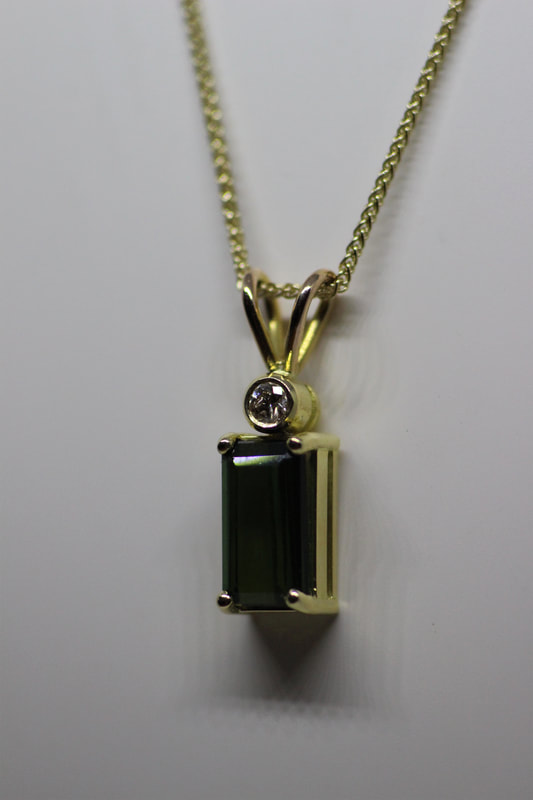
Sea Glass Jewellery and a Sterling Silver Pendant for a Harbour TraderAfter such a lovely response to my first sea glass ring, I have made a couple more along with a rare purple/mauve sea glass pendant to go into the hut when we are able to open. Now the weather seems to be brightening up earlier than expected, I will be heading down to the sea front more often to see what we can find for some more bench creations. Secondly, I have been working on my metal carving which will come in useful when I am at the point of learning to make casting patterns, however when it is finished, this pendant will be for a talented chef from one of our huts at Harbour Market Whitstable. I got to experiment with a few different burrs and files in a brass version I made first until I had found my favourite few and was confident enough to start it in silver. The biggest thing I'll take away from doing this job, is that it is far easier to leave the last bit of piercing out until I am ready to carve the outer section. This way I'll have a larger surface area to hold onto when creating the angle for the inner parts. Tourmaline and Diamond Pendant for Sian's 21st BirthdayOur week started with my youngest sisters 21st birthday, and in trying to make it a lovely occasion for her, Dad decided to make her a necklace using a stone that she unknowingly had chosen a couple of years previously when dad made my 21st gift. Her chosen Deep Green Tourmaline was claw-set in an 18ct Yellow Gold Gallery Setting and paired with a rub-over set 2.2mm Round Diamond. Poppies and setting more Sea Glass
|
AuthorMegan, the middle daughter of Stephen Randall, who has joined him in the workshop to follow a career in Jewellery Making and Silversmithing Archives
February 2023
Categories |


 RSS Feed